





1. The Classic Full Crown
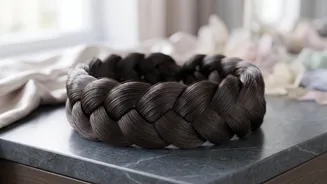
The most iconic halo braid is the full crown, a continuous braid that wraps around the entire head. The key to making this style achievable is to work with two braids instead of one. Start by parting your hair down the middle and creating two simple three-strand
braids, securing the ends with clear elastics. For a more polished look, you can do a Dutch braid (crossing strands under) or a French braid (crossing strands over). Once both braids are complete, lift one braid and lay it across the top of your head like a headband, pinning it securely on the opposite side. Repeat with the second braid, laying it just behind the first and tucking the end underneath to hide the elastic. A few well-placed bobby pins are all you need to keep everything in place for a look that's both elegant and secure.
2. The Half-Up Halo
For a quicker, more bohemian take, the half-up halo offers the best of both worlds. It frames the face with a beautiful braid while leaving the rest of your hair down to show off its length and texture. Start by sectioning off the top half of your hair, from your temples back. Split this section into two, and create a simple braid on each side, securing them with clear elastics. For a softer, more romantic feel, gently pull on the edges of each braid to 'pancake' them, making them appear fuller and more relaxed. Then, just like the classic version, wrap each braid across the back of your head and pin it on the opposite side, hiding the ends under the other braid for a seamless finish.
3. The Twisted Rope Halo
If you find traditional braiding tricky, the twisted rope halo is a stunning and simpler alternative. This style replaces braids with two-strand twists, which are faster to create and offer a unique texture. Part your hair and create two ponytails. Split each ponytail into two sections. Twist each section in the same direction (for example, to the right), and then twist the two sections together in the opposite direction (to the left). This locks the twist in place. Secure the ends with clear elastics. After creating your two rope twists, lay them across your head and pin them just as you would with a classic halo braid. You can gently pull apart the twists to give them more volume and a softer, more effortless look.
4. The Deconstructed Messy Halo
Perfect for a relaxed, romantic vibe, the messy halo braid embraces imperfection. The goal isn't a tight, perfect crown but a soft, lived-in style. Start with two loose braids, using either a traditional or fishtail technique. Before pinning them up, gently tug at the sides of the braids to create volume and a slightly undone look. Don't worry about flyaways; they add to the charm. When you pin the braids across your head, don't aim for perfect symmetry. Let them overlap casually. Pull out a few face-framing tendrils to soften the style even further. The beauty of this look is in its effortless feel, which is achieved by using pins to secure the basic shape while allowing for plenty of texture.
5. The Minimalist Pin-Secured Halo
This variation focuses on using a single braid and clever pinning for a clean, elegant look. Start a Dutch or French braid at your temple, and braid along your hairline, around your head. Continue braiding until you run out of hair to add, then finish with a regular braid to the end and secure with a clear elastic. Now, wrap the rest of the braid around your head, following the line you started. Tuck the tail end neatly under the beginning of the braid and secure it with bobby pins, making sure the elastic is completely hidden. You can use additional pins along the length of the braid to ensure it feels secure, especially at the nape of the neck. This method creates the illusion of one continuous, seamless halo.