


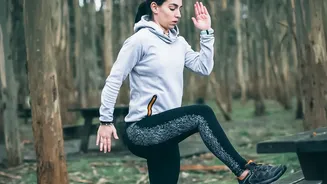
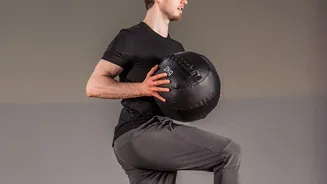
When the weather turns cold, indoor workouts like step-ups become a go-to. But most of us focus on the 'up' motion. The real secret to building winter-proof stability and strength lies in the part we usually rush: the controlled step-down.
The Overlooked Half of the Movement
The step-up
is a fantastic exercise for building lower-body strength in your glutes, hamstrings, and quads. It's a unilateral movement, meaning it works one leg at a time, which is excellent for correcting strength imbalances between your left and right sides. However, the exercise is composed of two parts: the concentric phase (stepping up) and the eccentric phase (stepping down). Most people power up and then drop back down with little to no control, treating the descent as a rest period. A controlled step-down deliberately focuses on that lowering phase, transforming the exercise from a simple lift into a powerful tool for stability and injury prevention.
Why Controlled Step-Downs Are Crucial for Winter
Focusing on the eccentric, or lowering, phase of the step-up offers unique benefits, especially during winter months when we face slippery surfaces and may be less active outdoors. This controlled movement builds superior neuromuscular control, essentially improving the communication between your brain and your muscles. This enhances your balance and proprioception, making you more stable and less likely to slip on an icy patch. Furthermore, eccentric training is highly effective at strengthening tendons and the stabilizing muscles around the knee. This builds resilience against the types of joint stress that can come from winter sports or simply navigating uneven, snowy ground. It's a functional strength that directly translates to real-world winter conditions.
How to Perform a Controlled Step-Down
To get this movement right, form is everything. Start without any weights to master the technique. 1. Find Your Step: Choose a sturdy box, bench, or stair. A good starting height is one where your knee is at roughly a 90-degree angle when your foot is on top. If you are a beginner, start with a lower step, around 10–15 centimetres. 2. Get in Position: Stand on the box with one foot fully planted. Your other foot should be off to the side, with your body upright. 3. Initiate the Descent: Keeping your chest up and core engaged, slowly bend the knee of your supporting leg. The entire focus should be on a slow, deliberate lowering motion. Imagine it taking 3 to 5 seconds to reach the floor. 4. Touch Down Lightly: Let the heel of your free foot gently touch the floor. Do not put your full weight on it or push off from this foot to get back up. 5. Return to the Top: Drive through the heel of your supporting leg to stand back up. The leg on the box should do all the work. Complete all repetitions on one side before switching to the other. Aim for 2–3 sets of 8–15 reps.
Common Mistakes to Avoid
Sloppy form can negate the benefits and even increase injury risk. Watch out for these common errors: Dropping Too Fast: The most frequent mistake is simply letting gravity do the work on the way down. The goal is to resist gravity. Pushing Off the Bottom Foot: Using your floor leg to bounce back up turns a unilateral exercise into a bilateral one, reducing the load on the working leg. Knee Collapsing Inward: If your knee on the working leg drifts inward, it's often a sign of weak hip stabilizers. Focus on keeping your knee aligned over your second toe. Using a resistance band around your knees can help teach proper alignment. Using a Step That Is Too High: If you have to lean excessively forward or use momentum, your step is too high. This compromises form and shifts stress to your lower back. Choose a lower platform to maintain control.