




Understanding the Challenge
The main reason moon photography is tricky is the extreme contrast. You are capturing a very bright, sunlit object surrounded by the blackness of space. Most cameras, in their automatic modes, try to expose for the darkness, which results in the moon being
completely overexposed and 'blown out'—losing all its beautiful crater details. The key to a good moon photo is to take manual control and tell your camera to expose for the moon itself, not the dark sky around it. Success hinges on controlling the light, ensuring stability, and achieving sharp focus.
Essential Prep for Any Camera
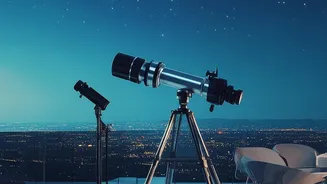
Before you even touch your camera settings, stability is your top priority. The moon is moving, and so are you. Using a tripod is the best way to eliminate camera shake, which is exaggerated by telephoto lenses and results in blurry photos. If you don't own a tripod, get creative: prop your phone or camera on a fence post, a stack of books, or the roof of your car. Anything steady will work. Secondly, use a timer or a remote shutter. The simple act of pressing the shutter button can cause enough vibration to blur the image. A 2-second timer is a simple and effective alternative.
For Smartphone Photographers
Your smartphone is more powerful than you think. First, avoid using the pinch-to-zoom feature. This is a 'digital' zoom, which simply crops the image and reduces quality. Instead, use your phone's maximum optical zoom if it has one. The most important step is to take control of the exposure. Tap on the moon on your screen; you should see a sun icon or a slider appear. Drag it down to reduce the brightness until you can see details on the moon's surface. For even better results, see if your phone's camera has a 'Pro' or 'Manual' mode. This will allow you to manually lower the ISO (light sensitivity) to its base level (like 100) and increase the shutter speed to capture a crisp image.
For DSLR or Mirrorless Cameras
If you have a camera with interchangeable lenses, use the one with the longest focal length you own—even a standard 70-300mm kit lens can deliver great results. Switch your camera to Manual (M) mode. A great starting point for a full moon is the 'Looney 11' rule: set your aperture to f/11, and then set your shutter speed to be the reciprocal of your ISO. So, if your ISO is 100, your shutter speed would be 1/100s. If your ISO is 200, your shutter speed would be 1/200s. Start with a low ISO like 100 or 200 to get a clean, noise-free image. These settings are a baseline; from there, you can adjust your shutter speed faster if the image is too bright, or slower if it's too dark.
Focusing is Everything
Autofocus often struggles with the moon, hunting back and forth in the dark. Your best bet is to switch your lens to manual focus (MF). Turn on your camera’s 'Live View' so you can see the image on the rear screen. Use the magnification button to zoom in digitally on the moon as much as possible—this is not for the final shot, but just for focusing. Now, carefully turn the focus ring on your lens until the craters and edges of the moon appear perfectly sharp. This technique is far more accurate than relying on autofocus and is crucial for getting those crisp details.
Shooting Different Phases
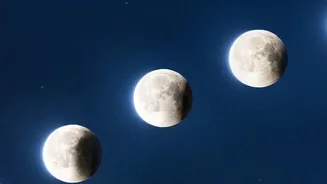
While the full moon is spectacular, it's not always the best phase for photography. The direct, flat light can wash out surface details. Crescent or half-moons often reveal more texture and crater definition because the sunlight hits them from the side, creating dramatic shadows. For these less-illuminated phases, you'll need to let in more light. Try opening your aperture to a lower f-number like f/8 or f/5.6, or using a slightly slower shutter speed than you would for a full moon. Shooting at twilight, just after sunset or before sunrise, can also help by reducing the harsh contrast between the moon and the sky.