






Start with the Right Flour and Water Temperature
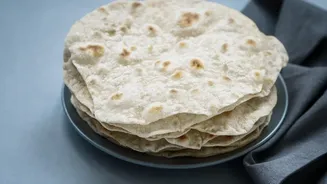
The foundation of a great roti is high-quality whole wheat flour, known as atta. Different brands of atta have varying levels of fibre and protein, which affects how much water they absorb. Some experts suggest freshly milled chakki atta retains natural
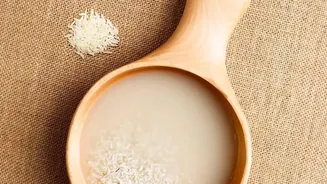
oils and moisture, which contributes to softer rotis but may require less water. The temperature of your water also plays a crucial role. While many use room temperature water, using lukewarm or even moderately hot water can make a significant difference. Warm water helps the flour hydrate more quickly and efficiently, relaxing the starches and resulting in a dough that feels more pliable from the very beginning. This initial hydration is key to avoiding a dense, hard final product.
The Gradual Art of Hydration
One of the most common mistakes is adding too much water at once. This almost guarantees a sticky dough that's difficult to handle. The goal is a well-hydrated dough that is soft to the touch but doesn't cling to your hands or the bowl. The best practice is to start by adding about half to three-quarters of your water, mixing it in with your fingertips in a circular motion. Continue to add water gradually, a teaspoon or tablespoon at a time, until the dough just comes together. The ideal water-to-flour ratio is often around 1:2, but this can vary. If your dough feels too sticky, you've likely added too much water. The fix is to dust it lightly with dry atta, but avoid adding too much, which can dry it out.
Mastering the Kneading Technique
Proper kneading develops the gluten network, which gives the roti its structure and softness. Once the dough has come together, knead it for about 5 to 10 minutes. Use the heel of your hand and your knuckles to press, fold, and stretch the dough. You're aiming for a smooth, elastic, and pliable texture. When you press a finger into the dough, it should leave a gentle impression. If the dough feels too tight, wet your hands and continue kneading; if it’s too sticky, a light dusting of flour will help. Some cooks also recommend adding a teaspoon of oil or ghee towards the end of kneading. This not only adds flavour but also helps to create a smoother texture and lock in moisture.
The Non-Negotiable Resting Period
Resting the dough is a critical step that should never be skipped. After kneading, cover the dough with a damp cloth or a plate and let it rest for at least 20 to 30 minutes. This resting period allows the flour to fully absorb the water, a process that makes the dough noticeably less sticky and much smoother. It also gives the gluten strands, which were tightened during kneading, time to relax. A relaxed dough is far easier to roll out evenly, and it won't spring back as you work. This even hydration and gluten relaxation are essential for rotis that puff up properly and remain soft long after they're cooked.
Troubleshooting and Final Touches
Even with practice, you might encounter issues. If your dough becomes sticky after resting, it may mean the flour has become fully hydrated; a very light re-kneading for a minute can help redistribute the moisture. When it's time to roll, divide the dough into equal-sized smooth balls. Dust them lightly with dry flour to prevent sticking, but be sure to dust off any excess before cooking, as loose flour can burn on the tawa and make the roti hard. Roll the dough gently and evenly from the centre outwards. Uneven thickness can lead to hard spots or prevent the roti from puffing up. Cooking on a properly heated tawa—hot but not smoking—is the final key to a perfectly soft and puffed roti.