






The Classic Dutch Halo Braid
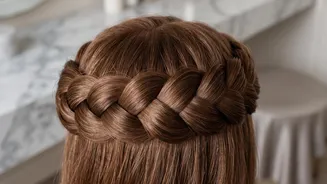
Often called a crown braid, the classic halo is typically created using a Dutch braiding technique. A Dutch braid is sometimes called a 'reverse French braid' because you cross the strands under the middle piece instead of over. This makes the braid pop,
creating a defined, three-dimensional crown that sits on top of your hair. Starting with a deep side part, you begin braiding along the hairline, gathering small sections of hair as you work your way around your head. The key is to keep the braid tight against the scalp as you go. Once you have braided all the way around and run out of hair to add, you finish with a standard braid, wrap it around to meet the start, and tuck the end in, securing it discreetly with bobby pins. This style is exceptionally secure, making it ideal for days filled with meetings or long-haul flights.
The Two-Braid 'Milkmaid' Method
For those who find braiding around their own head a bit tricky, the milkmaid braid offers a much simpler path to a similar look. This technique involves parting your hair down the middle and creating two braided pigtails. You can use a standard three-strand braid, a fishtail, or a Dutch braid for each pigtail, depending on your preference. Once both braids are secured with elastics, you simply lift one braid up and over the top of your head, like a headband, and pin it in place. Then, do the same with the other braid, laying it next to the first one and tucking the ends to hide them. Gently pulling on the loops of the braid, or 'pancaking' it, can create a fuller, more relaxed look. This method is not only fast but also very stable.
The Deconstructed or 'Faux' Halo
If a perfectly neat braid feels too formal, the deconstructed halo is your answer. This style focuses on texture and a more relaxed, bohemian vibe. It often starts with creating two braids, similar to the milkmaid style. The key difference is the prep and finish. Before braiding, adding a texturizing spray or working with second-day hair can provide more grip and volume. After the braids are created, they are pulled apart significantly to look looser and almost undone. When you pin them around your head, you can leave out face-framing tendrils and allow for a bit of messiness. Another way to achieve a faux halo is to create a loose updo or bun at the back and then wrap one or two braids around your head to give the impression of a full halo without braiding all of your hair. It's a secure style that looks effortlessly chic.
The Half-Up Halo Braid
A perfect compromise for when you want your hair secured away from your face but still want to show off its length is the half-up halo. This style involves sectioning off the top half of your hair and creating two braids, one on each side of your part. You then wrap these braids around the back of your head, pinning them in place to form a 'half-crown' while the rest of your hair flows freely. It’s a versatile look that works well for both casual and more formal settings. For added security and a more polished finish, you can start with an inverted or Dutch braid on each side. This style keeps the most bothersome parts of your hair contained without requiring a full updo, making it great for a day at the office that might transition into an evening out.
The Embellished Halo Braid
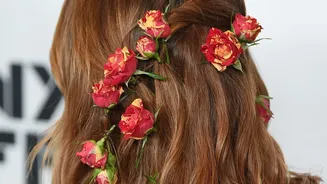
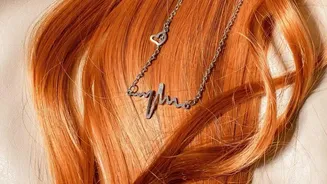
Any halo braid style can be elevated for a special occasion or simply to add a personal touch. Embellishing your braid turns a practical hairstyle into a statement piece. This is less a different technique and more a styling choice. After creating your halo braid using any of the methods above, you can weave in ribbons, or add decorative pins, beads, or even small, fresh flowers for a festive look. For a touch of glamour, consider using hair cuffs or threading a fine metallic chain through the braid. These additions not only enhance the visual appeal but can also add a bit of extra structure and hold to the style, ensuring it remains picture-perfect through any event, long journey, or workday.