



The messy bun is a true hairstyle hero—effortlessly chic and endlessly versatile. But what if you could elevate this everyday favourite with just a few bobby pins? It's time to rethink the humble pin, not just as a tool, but as an accessory.
Mastering the Foundation
Before you
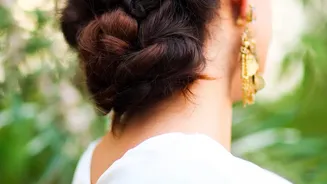
can add details, you need a stable canvas. The perfect messy bun is secure but not severe. Start by gathering your hair into a high ponytail. For better hold, especially on clean, silky hair, a spritz of dry shampoo or texturizing spray will add some helpful grit. Twist the ponytail loosely, wrap it around its base to form a bun, and secure it with a hair elastic. Don't aim for perfection; a few loose strands add to the charm. The key is to make the bun tight enough to stay put but loose enough that you can tuck and pin without creating tension.
The Geometric Accent
One of the trendiest ways to use bobby pins is to create sharp, geometric shapes that contrast with the softness of the bun. The triangle is a popular and surprisingly easy choice. Place it just below your bun or on the side for an asymmetrical look. To create it, slide one bobby pin in diagonally. Then, slide a second pin in the opposite diagonal direction to form an 'X' or a 'V'. Complete the shape by sliding a third pin horizontally across the bottom to form the base of the triangle. For this look, using pins that contrast with your hair colour—like gold, silver, or bright colours—makes the design pop.
The Simple Criss-Cross Frame
If creating shapes feels too complicated, the criss-cross technique offers a simpler way to add flair. This method is both functional and decorative, perfect for securing stray sections or just adding visual interest around the base of your bun. Simply take two bobby pins and slide them over each other to form an 'X'. You can create a single 'X' to tack down a flyaway or arrange a series of them around the bun for a more deliberate, framed effect. This technique works especially well at the nape of the neck to secure shorter layers that won't quite reach the bun.
A Pro Tip for All-Day Hold
The biggest frustration with any updo is its tendency to loosen over time. To give your bobby pins extra gripping power, try this simple trick: before placing a pin, lightly spray it with stronghold hairspray or dry shampoo. Let it sit for a moment until it feels slightly tacky. This adds a layer of texture that helps the pin lock into your hair and stay put for hours. Also, remember to insert the pin with the wavy side against your scalp; those ridges are designed to grip the hair for a more secure hold.
Using Colour and Embellishments
Bobby pins are no longer meant to be invisible. They now come in a rainbow of colours and with decorative elements like pearls, jewels, and metallic finishes. Using coloured pins is an easy way to coordinate your hairstyle with your outfit or makeup. You can stack several brightly coloured pins parallel to each other for a bold stripe effect or create a fan shape by angling them around one side of your bun. If you can't find the colour you want, you can even make your own by painting standard bobby pins with your favourite nail polish.
The Starburst or Fan Effect
For a more dramatic statement, the starburst or fan is a beautiful option. This involves arranging several bobby pins so they radiate outwards from a central point, often from the side or base of the bun. To achieve this, start by placing one pin. Then, place the next pin right beside it, angled slightly away from the first. Continue adding pins, fanning them out to create a starburst or sunray effect. Using five to seven pins usually creates a full, impactful design. This is another style where metallic or coloured pins can really shine, turning a simple bun into a piece of art.