





The First Line of Defense: A Rain Cover
The simplest and most common way to shield your bag is with a backpack rain cover. Many hiking packs come with an integrated cover stored in a small pocket, but you can also buy them separately in various sizes. These lightweight, waterproof shells slip
over the outside of your pack, acting as a raincoat to deflect rain, snow, and dust. The main advantage is speed; you can pull it over your pack in seconds. However, they have downsides. Strong winds can blow rain underneath, and they don't cover the harness system, meaning your shoulder and hip straps will still get wet. Accessing side pockets or the main compartment also requires partially removing the cover, which can let water in during a heavy storm.
Bulletproof Your Interior: Pack Liners
For more reliable protection, many experienced travellers and hikers swear by an internal pack liner. This is essentially a large, waterproof bag that you place inside your backpack before packing your gear. You can buy dedicated pack liners made of lightweight, durable material, or a heavy-duty, unscented trash compactor bag can work as a budget-friendly alternative. The method is simple: place the liner in your empty pack, pack your belongings inside it, and then roll the top of the liner down tightly to create a watertight seal. The key benefit is that even if your backpack's fabric gets completely soaked, the contents inside the liner remain perfectly dry. This is the most effective way to protect critical items like a sleeping bag or spare clothes.
Organize and Protect: Using Dry Bags
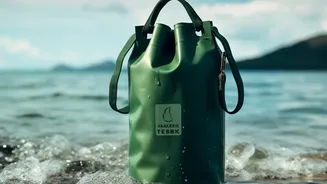
For a 'belt and braces' approach, you can combine a pack liner with smaller, individual dry bags. This strategy involves compartmentalizing your gear. Use separate dry bags for electronics, clothing, toiletries, and food. This not only adds another layer of waterproofing but also keeps your gear neatly organized. If you need to pull one item out, you don’t have to expose everything to the elements. For especially sensitive items like a phone, camera, or passport, a small, dedicated dry bag is a non-negotiable, even on trips where you don't expect rain. This method is particularly useful for activities like kayaking or pack-rafting where full submersion is a risk.
Refresh the Fabric: DWR Sprays
Most backpacks are treated with a Durable Water Repellent (DWR) finish at the factory. This coating causes water to bead up and roll off the fabric. Over time, dirt, abrasion, and sun exposure cause this finish to wear off. You can restore it using a waterproofing spray. First, thoroughly clean your backpack, as dirt can prevent the spray from bonding to the fabric. Then, apply the spray evenly across the entire outer surface from about six inches away, paying extra attention to the seams. Let it dry completely, ideally for 24 hours. While a DWR spray won't make an old pack fully waterproof, it significantly improves its water resistance in a light shower.
Seal the Weak Points: Seams and Zippers
A backpack's weakest points are its seams and zippers. The tiny holes created by stitching are prime entry points for water. You can fortify these areas using a seam sealer. Turn the pack inside out and apply a thin layer of a urethane-based or silicone-based sealer directly onto the stitching. Use a small brush for even application and let it cure in a well-ventilated area for 8-12 hours. Zippers are harder to seal, but rubbing beeswax or a silicone zipper lubricant along the teeth can help improve their water resistance. This step is more intensive but offers a higher level of protection for serious outdoor use.