


What Exactly Are Micro-Greens?
Before you start, it is helpful to understand what micro-greens are—and what they are not. They are not sprouts, which are germinated seeds eaten whole, root and all. Instead, micro-greens are the very first stage of a vegetable or herb's life after it develops
its first set of leaves, called cotyledon leaves. Harvested just one to three weeks after planting, these tiny greens are prized for their intense flavor, vibrant color, and delicate texture. They capture the essence of the mature plant in a tiny, edible package, making them a favorite of chefs and home cooks alike for garnishing salads, sandwiches, and soups.
A Nutritional Powerhouse on Your Counter
The term "nutrient-dense" is not just a marketing buzzword when it comes to micro-greens. Research has shown that these miniature greens can contain significantly higher concentrations of vitamins and minerals than their fully grown counterparts. A 2012 study from the USDA and the University of Maryland found that micro-greens can have anywhere from four to 40 times the nutrient concentration of mature plants. For example, red cabbage micro-greens were found to have six times more vitamin C and 69 times more vitamin K than mature red cabbage. This is because a plant’s essential nutrients are most concentrated in the seedling stage, before they become diluted as the plant grows larger.
Why Shallow Trays Are an Urban Gardener's Secret
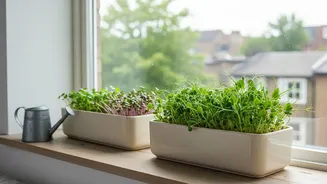
For anyone living in an apartment or home with limited space, traditional gardening is often out of the question. This is where shallow tray systems shine. These trays, often just an inch or two deep, require minimal space and can fit on a windowsill, countertop, or a small shelf. Their shallow depth is perfect for the short root systems of micro-greens, preventing wasted soil and water. Using trays gives the grower complete control over the environment—light, water, and temperature—ensuring a successful harvest year-round, regardless of the weather outside. This method eliminates the need for a backyard and makes fresh produce accessible to everyone.
Your Simple Setup: What You Will Need
Getting started with micro-greens is surprisingly simple and requires minimal equipment. You do not need a green thumb, just a few basic supplies: Shallow Trays: Look for trays specifically designed for micro-greens, ideally one with drainage holes and a matching solid tray to place underneath for bottom-watering. Standard 10x20 inch trays are common, but smaller versions are available. Growing Medium: Coconut coir or a fine-quality potting soil are popular choices. These mediums retain moisture well and provide a good base for seeds. Seeds: Choose seeds specifically labeled for micro-green production to ensure they have not been treated with fungicides. Light: A sunny windowsill that receives at least four to six hours of direct sunlight is often sufficient. If not, a simple LED grow light will provide the necessary light spectrum for healthy growth. * Spray Bottle: A spray bottle for misting the seeds during germination is essential for maintaining moisture without dislodging them.
A Step-by-Step Guide to Your First Harvest
Growing your own micro-greens is a quick and rewarding process. Most varieties are ready to harvest in 7 to 14 days. Here is a basic step-by-step guide: 1. Prepare the Tray: Fill your tray with about an inch of your chosen growing medium, lightly patting it down to create a level surface. 2. Sow the Seeds: Sprinkle your seeds evenly and densely across the entire surface of the soil. There is no need to cover them with soil; they just need to make good contact with the growing medium. 3. Germinate: Mist the seeds thoroughly with water. Cover the tray with a lid or another tray to create a dark, humid environment for germination. Mist daily for the first two to three days. 4. Introduce Light: Once you see the first signs of germination, remove the cover and move the tray to a sunny spot or place it under a grow light. Water the tray from the bottom by pouring water into the solid tray underneath to encourage roots to grow downward and prevent mold on the surface. 5. Harvest: In about a week or two, your micro-greens will be one to three inches tall. To harvest, use a sharp pair of scissors or a knife to cut the greens just above the soil line.
Easy Micro-Greens for Beginners
Not all micro-greens are created equal when it comes to ease of growing. For your first attempt, it is best to start with varieties that are known to be forgiving and fast-growing. Radish micro-greens are a top choice for beginners, often ready to harvest in as little as five to seven days. Broccoli, kale, mustard, and arugula are also excellent, reliable options that provide consistent results and a quick harvest. Pea shoots are another favorite, producing thick, crunchy stems with a high yield that feels very rewarding for a first-time grower.