








Why the Rush? Understanding the Timeline
Japan does not offer a visa-on-arrival for Indian citizens, meaning you must secure your visa before you travel. While the official processing time at the embassy is often cited as 5 to 10 working days, this is only part of the story. The complete end-to-end
process—from gathering documents and booking a visa appointment to submission and getting your passport back—can realistically take anywhere from two to five weeks. During peak travel seasons like the cherry blossom bloom in spring or the autumn foliage, this timeline can stretch even further. Visa processing cannot be expedited based on your travel date, so applying at least four to six weeks in advance is highly recommended to avoid any last-minute anxiety.
Your Essential Tourist Visa Checklist
Accuracy and completeness are your best friends in this process. A single missing or inconsistent document can lead to delays or rejection. Here is a rundown of the mandatory documents for a standard tourist visa: a valid passport with at least six months' validity and two blank pages; a completed visa application form; a recent passport-sized photograph with a white background (usually 45mm x 45mm); confirmed round-trip flight bookings; and confirmed hotel bookings for your entire stay. You must also provide a detailed day-by-day travel itinerary. Financial documents are crucial, including your last three to six months of bank statements and Income Tax Returns (ITR) for the last two to three years.
The Application Process Demystified
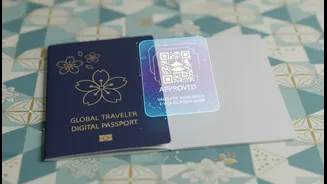
For most Indians, the visa process runs through VFS Global centres, which handle applications for the Embassy of Japan. The first step is to identify the correct jurisdiction for your passport and application centre. After gathering all your documents, you will need to book an appointment for submission, though some centres may allow walk-ins. An important recent development is the introduction of an eVisa for single-entry tourist visits, which can be applied for online through accredited agencies. This eVisa is delivered as a digital 'Visa Issuance Notice' that you present on your smartphone, eliminating the need for a physical passport submission during processing. However, for multiple-entry visas or other visa types, the traditional paper application route via VFS is still required.
Common Pitfalls and How to Avoid Them
The most frequent reasons for rejection are often avoidable. Incomplete or inconsistent information is a major red flag for visa officers. Ensure your name and other details are spelled identically across all documents, from your passport to your flight itinerary. Insufficient proof of funds is another common issue. While there's no official minimum, having a healthy and stable bank balance is recommended to show you can support your trip. A weak or illogical travel itinerary can also raise doubts; your plan should be clear and credible. Finally, double-check every detail on your application form before signing it, as simple errors or unsigned forms are a leading cause of rejection.
Beyond the Visa: The 'Visit Japan Web' Service
Once your visa is secured, there's one more step to streamline your arrival: the 'Visit Japan Web' service. This online platform allows you to pre-register your immigration and customs information. Before your flight, you can fill out the required details and receive two QR codes—one for immigration and one for customs. Upon landing at major Japanese airports like Narita, Haneda, or Kansai, you simply present these codes on your smartphone. While using this service isn't mandatory—paper forms are still available—it is highly recommended as it can significantly speed up your passage through the airport, letting you start your Japanese adventure sooner.