


The Rise of a Zero-Waste Snack
Across Instagram reels and YouTube tutorials, a quiet revolution is happening in kitchens committed to sustainability. The star of the show? Watermelon rind. Long relegated to the compost bin, the thick, white part of the watermelon is being transformed
into everything from pickles to curries. But the most intriguing creation gaining traction is the baked watermelon rind crisp. It’s a trend born from the 'root-to-stem' philosophy, which encourages using every part of a fruit or vegetable to minimise food waste. For home cooks in India, where resourcefulness is a way of life, this isn't a new concept, but applying it to the humble tarbooz rind in this modern, snackable format feels fresh, fun, and incredibly satisfying. It’s about more than just saving scraps; it’s a creative challenge that results in a genuinely tasty treat.
What's in a Rind?
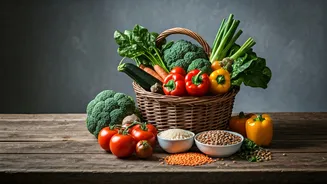
So, what are you actually eating? The white part of the rind, nestled between the tough green skin and the sweet pink flesh, has a surprisingly neutral flavour and a firm, crisp texture, similar to a cucumber or jicama. This makes it a fantastic canvas for flavour. Nutritionally, it’s no slouch either. Watermelon rind is a good source of fibre and contains citrulline, an amino acid that may have benefits for heart health and exercise performance. By baking it, you're not just preventing waste; you're unlocking a low-calorie, nutrient-rich ingredient that was hiding in plain sight. Don’t be intimidated by its bland reputation—that neutrality is its greatest strength, allowing it to soak up any seasoning you throw at it.
Step 1: Preparing the Rind
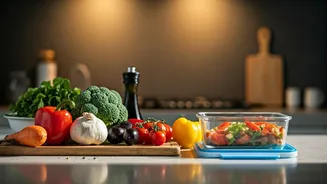
Proper preparation is the key to perfectly crispy results. First, make sure you wash the outside of the watermelon thoroughly before you cut into it. Once you’ve eaten the pink flesh, you’re left with the rind. Using a sturdy vegetable peeler, shave off the tough, dark green outer skin. You can also do this with a sharp knife, carefully slicing it away. You want to be left with just the thick, white part. Now, slice this white rind as thinly as possible. A mandoline slicer is your best friend here, creating uniform, paper-thin slices that will bake evenly. If you don't have one, a sharp knife and a steady hand will work just fine. Aim for slices about 1-2 mm thick. The thinner the slice, the crispier the final chip will be.
Step 2: Seasoning is Everything
This is where you can get creative. The neutral flavour of the rind means you can push it in any direction—sweet, savoury, spicy, or a combination. Lay your thin rind slices on a paper towel and pat them dry to remove excess moisture. In a bowl, toss the slices with a tablespoon of oil (like olive or coconut oil) to help the seasonings stick and promote crisping. For a simple savoury crisp, a generous sprinkle of sea salt, black pepper, and garlic powder is fantastic. Want some heat? Add a pinch of cayenne or red chilli powder. For a classic Indian twist, try a mix of chaat masala and a little amchur (dried mango powder) for a tangy kick. If you have a sweet tooth, a dusting of cinnamon and a tiny bit of sugar can turn these into a delightful dessert crisp.
Step 3: The Low and Slow Bake
Patience is a virtue when baking watermelon crisps. The goal is to dehydrate the rind slowly, not to scorch it. Preheat your oven to its lowest temperature, typically around 100-120°C (200-250°F). Arrange the seasoned rind slices in a single layer on a baking sheet lined with parchment paper. Make sure they don't overlap, as this will cause them to steam instead of crisp up. Bake for 1.5 to 2 hours, flipping them halfway through. The exact time will depend on the thickness of your slices and the humidity in your kitchen. You'll know they're done when they are shrunken, dry to the touch, and have a light, crispy texture. Let them cool completely on the baking sheet; they will continue to crisp up as they cool down.