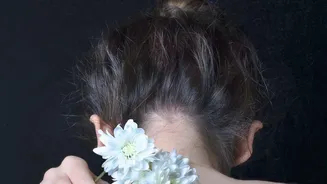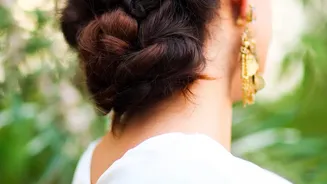



The messy bun is a timeless paradox: perfectly imperfect and effortlessly chic, yet tricky to master. This quick guide unlocks the secrets to creating a high, textured messy bun that looks amazing and actually stays put all day.
The Allure of the Undone Bun
From running errands to
a casual date night, the messy bun is a versatile staple. It’s the ultimate go-to for its ability to look both put-together and completely relaxed. But as many of us have discovered, there is an art to the 'messy' part. The goal isn't a sloppy, falling-out knot, but a thoughtfully constructed style that has volume, texture, and staying power. It's the hairstyle equivalent of the 'no-makeup' makeup look; it seems effortless, but a little technique goes a long way. The high textured bun, specifically, elevates the look by positioning it at the crown of the head, creating a more dramatic and stylish silhouette.
Prep Work Is Everything
The secret to a great messy bun begins before you even put your hair up. The best foundation is hair that isn't freshly washed—second or third-day hair has more natural grit and hold. If your hair is clean or too silky, you need to add texture manually. A generous spritz of dry shampoo at the roots will absorb excess oil and add volume. A texturizing spray misted through the mid-lengths and ends will give the strands the 'grip' they need to form the bun and stay in place. Don't be afraid of these products; they are the key to giving fine or slippery hair the body it needs to build a substantial bun.
Step 1: The High Ponytail Foundation
Your bun's final placement is determined by your ponytail. For a classic high bun, flip your head upside down and gather your hair into a ponytail right at the crown of your head. Use your fingers instead of a brush to maintain a looser, more natural feel around your hairline. Secure it with a good hair tie—not too tight, not too loose. Some bumps are not only okay, they're encouraged for that 'undone' look. If you want to frame your face, now is the time to pull out a few small strands of hair around your temples and ears.
Step 2: Twist, Wrap, and Secure
There are two popular methods for forming the bun itself. The first is the 'twist and wrap'. Simply twist your ponytail into a coiled rope, then wrap that coil around the base of your ponytail and secure the end. The second, and often easier, method is the 'loop'. On the final pull_through of your hair elastic, don't pull the ponytail all the way through. Instead, create a loop of hair, leaving the ends out. You can then wrap the leftover ends around the base of the elastic and secure them with bobby pins. This method often creates a fuller_looking bun right from the start.
Step 3: Build That Perfect Texture
This is the most crucial step for achieving the 'textured' look. Your bun is formed, but it's likely too neat. Now, it's time to make it messy in a controlled way. Gently pull and tug on sections of the bun to loosen it and make it bigger—a technique often called 'pancaking'. Don't pull the strands all the way out; just tug enough to create volume and a softer shape. You can also use U_shaped pins to hook parts of the bun and secure them in a new position, adding dimension. This is what transforms a simple knot into a styled, textured bun.
Tips for Different Hair Types
Not all hair is created equal, and your bun technique may need adjusting. For thin or fine hair, teasing the ponytail before you twist it into a bun can create the illusion of more volume. Using products like dry shampoo is non_negotiable. For thick hair, you may need stronger hair ties and a few extra bobby pins to keep everything secure. For curly hair, work with your natural texture. Use your fingers to gather your hair rather than a brush, which can disrupt your curl pattern and create frizz. Silk or satin scrunchies are a great option to prevent breakage and dents in your curls.