



The Effortless Everyday Essential
In the world of hairstyles, few are as reliable as the low bun. It’s the perfect solution for second-day hair, a chic way to stay cool in the heat, and a polished choice for the office. Yet, a flat, tight bun can sometimes feel severe or underwhelming.
The goal is an 'undone' look that feels intentional—soft, full, and flattering. Adding a touch of volume at the crown and in the bun itself elevates the style, giving it an air of relaxed elegance that works for any occasion. This guide will walk you through creating that perfect, voluminous low bun that looks like you put in far more effort than you actually did.
Gather Your Styling Tools
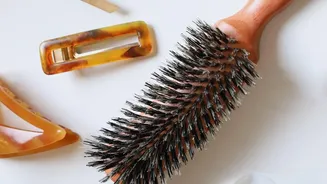
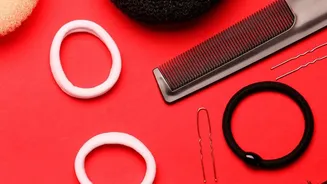
You don't need a professional kit to achieve this look, but a few key items will make the process much smoother. Before you begin, gather the following: a hairbrush, a snag-free hair elastic, several bobby pins that match your hair colour, a texturizing spray or dry shampoo, and a light-hold hairspray. For those with fine or thin hair, a texture powder or thickening cream can be a game-changer for adding grip and the illusion of fullness. A boar bristle brush can be particularly helpful for smoothing the hair and taming flyaways without sacrificing the soft look you're going for.
Step 1: Prepare Your Hair for Volume
The foundation of a good bun is the right texture. This style holds best on hair that isn’t freshly washed, as the natural oils provide some grip. If your hair is clean and slippery, that's where your products come in. Start by spraying a texturizing spray or dry shampoo throughout your hair, focusing on the roots and the mid-lengths. This will absorb excess oil and create the grit needed for your style to hold. Gently massage the product into your roots to build a foundation of volume before you even start styling.
Step 2: Create the Low Ponytail
Part your hair where you normally would, or for a softer look, skip a defined part and simply use your fingers to sweep your hair back. Gather your hair into a low ponytail at the nape of your neck. Before securing it tightly, gently loosen the hair at the crown by pulling small sections upward. This creates instant, soft volume at the top of your head, which is crucial for a balanced silhouette. Once you have the desired lift, secure the ponytail with your hair elastic. Don't make it painfully tight; you want the base to remain soft.
Step 3: Build the Bun
Now, it's time to form the bun. There are a few easy techniques to create that voluminous shape. One popular method is to twist the ponytail, wrap it around the base, and secure it with bobby pins. As you wrap, gently pull on the twist to fatten it up. Another beginner-friendly technique involves not pulling the ponytail all the way through the elastic on the final loop, leaving a looped bun. You can then take the leftover ends and wrap them around the elastic to conceal it, pinning them in place. For finer hair, try splitting the ponytail into two sections, twisting them, and then knotting them together before rolling the knot up toward the elastic and pinning. This knotting method builds structure and gives the illusion of a fuller bun.
Step 4: The Finishing Touches
Once your bun is secured, the final step is to perfect the shape and add that 'effortless' quality. Use your fingertips to gently pull and pancake the bun, spreading it out to make it appear larger and fuller. If any sections feel too tight, loosen them. This is what transforms it from a simple knot into a soft, romantic style. Pull out a few face-framing tendrils to soften the look further. A light mist of hairspray will help set the style and control major flyaways without making it stiff. The key is for it to look polished yet lived-in.