


The No-Bake Advantage
The word ‘cheesecake’ often conjures images of cracked tops, weeping fillings, and the dreaded water bath. Baked cheesecakes are notoriously fussy, requiring precise temperatures and a gentle cooling process to prevent disaster. This is where the magic
of a no-bake cheesecake comes in. By eliminating the oven entirely, we sidestep all the common pitfalls. There's no risk of overbaking, no sudden temperature changes to cause cracks, and no need for special equipment. The filling is set in the refrigerator, a gentle and forgiving process that results in a consistently silky, smooth, and flawless surface. It’s the ultimate shortcut to a dessert that looks like you laboured over it for hours, when in reality, the fridge did most of the work.
Ingredients for Success
This recipe relies on simple, accessible ingredients. The key is to use full-fat products for the richest flavour and best texture. You will need: **For the Crust:** * 200g digestive biscuits (or Marie biscuits) * 100g unsalted butter, melted * 1 tablespoon granulated sugar (optional) **For the Filling:** * 500g full-fat cream cheese, softened to room temperature * 400g sweetened condensed milk, chilled * 1/4 cup fresh lemon juice * 1 teaspoon vanilla extract **Essential Equipment:** * An 8-inch or 9-inch springform pan. This is non-negotiable for that clean, professional removal.
Step 1: The Perfect Foundation
The crust is the bedrock of your cheesecake. To make it, crush the biscuits into a fine crumb. You can do this by placing them in a sealed bag and rolling over them with a rolling pin, or by pulsing them in a food processor. Transfer the crumbs to a bowl, add the optional sugar, and pour in the melted butter. Mix with a fork until the mixture resembles wet sand. Tip this mixture into your springform pan and press it down firmly and evenly across the base and slightly up the sides. The flat bottom of a glass or measuring cup is the perfect tool for this job. A firm, even crust not only tastes better but also provides a stable base for a clean slice. Place the crust in the refrigerator to set while you prepare the filling.
Step 2: The Silky-Smooth Filling
The secret to a lump-free filling is starting with truly softened cream cheese. Let it sit at room temperature for at least an hour. In a large bowl, use an electric mixer to beat the cream cheese on medium speed until it is completely smooth and creamy, with no lumps in sight. Scrape down the sides of the bowl. Next, on low speed, gradually pour in the chilled sweetened condensed milk and beat until just combined. Finally, add the lemon juice and vanilla extract, and mix until smooth. The lemon juice not only adds a beautiful, bright tang that cuts through the richness but also reacts with the condensed milk to help thicken and set the filling.
Step 3: The Flawless Finish
Pour the filling over your chilled biscuit crust. Now for the professional touch: use an offset spatula or the back of a spoon to smooth the top into a pristine, level surface. To achieve that perfect look, work from the centre outwards, gently spreading the mixture until it meets the edges of the pan. Give the pan a few gentle taps on the countertop to release any air bubbles. Now, cover the pan with plastic wrap (be careful not to let it touch the surface of the filling) and refrigerate for at least 6 hours, or preferably overnight. This long, slow chill is crucial for the cheesecake to set firmly.
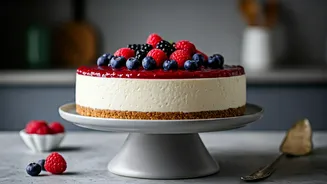
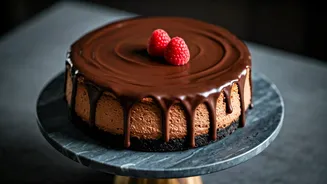
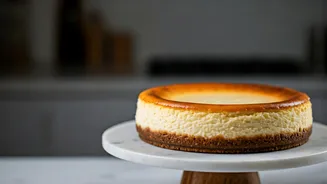
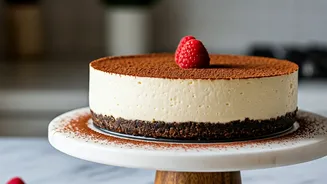
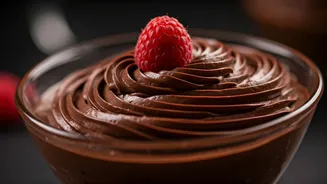
Presentation is Everything
Once fully chilled, it's time for the big reveal. Run a thin knife around the edge of the cheesecake to loosen it from the pan before unclipping the springform ring. The result should be a perfect cylinder with sharp edges. To decorate, you don’t need to be a pastry chef. Simplicity is elegance. A handful of fresh berries—strawberries, blueberries, or raspberries—arranged in the centre looks stunning. A simple drizzle of a store-bought or homemade fruit coulis, a dusting of cocoa powder, or a scattering of dark chocolate shavings can also elevate the look instantly. The key is to add the garnish just before serving to keep it looking fresh and vibrant.