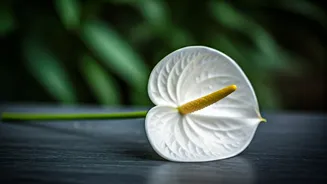


The Rise of a Minimalist Marvel
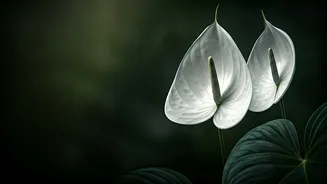
So, why the sudden obsession with white anthuriums? In a world saturated with vibrant colours and maximalist prints, the anthurium offers a moment of calm. Its pristine white spathe (the waxy, petal-like leaf) and contrasting spadix (the central spike)
create a striking, modern silhouette. This isn't the fussy, high-maintenance plant of old. It’s a statement piece that aligns perfectly with the current desire for clean lines, natural textures, and sustainable decor. Unlike cut flowers that wilt in days, a well-cared-for anthurium provides continuous beauty for years. Its long-lasting blooms and air-purifying qualities make it a practical as well as a beautiful addition to any space. It’s a plant that works hard, looks good, and asks for relatively little in return—the trifecta for today's busy homeowner.
What is Propagation?
Before we get our hands dirty, let's demystify the term. 'Propagation' is simply the process of creating new plants from a parent plant. For anthuriums, this is surprisingly straightforward and incredibly rewarding. Instead of buying a new plant, you can multiply your existing one to fill your home with more green beauties or share them with friends. The most common and beginner-friendly method for anthuriums is propagation by division, which we'll focus on here. This involves separating a mature, healthy plant into smaller, individual plants.
Your Propagation Toolkit
You don't need a professional nursery to get started. Gather these simple tools before you begin: * **A Mature Anthurium:** Choose a healthy, bushy plant with multiple stems growing from the base. A plant that looks a little crowded in its pot is a perfect candidate. * **A Clean, Sharp Knife or Pruners:** Sterilise your cutting tool with rubbing alcohol to prevent the spread of disease. * **New Pots:** Select pots that are slightly larger than the root balls of your new divisions. Ensure they have drainage holes. * **Fresh Potting Mix:** Anthuriums thrive in a well-draining, airy mix. A blend of orchid bark, perlite, and coco peat is ideal. You can find pre-made aroid mixes at most garden centres. * **Gloves (Optional):** Anthurium sap can cause mild skin irritation for some, so gloves are a good idea.
A Step-by-Step Guide to Division
Ready to make some magic? Follow these simple steps. 1. **Gently Remove the Plant:** Carefully ease the parent anthurium out of its pot. If it’s stuck, you can gently squeeze the sides of the pot or tap the bottom to loosen it. 2. **Examine the Roots:** Lay the plant on its side and gently dust off the excess soil from the root ball. You will see natural clumps or sections, each with its own set of stems and roots. 3. **Divide and Conquer:** Identify a section with at least one or two healthy leaves and a good network of roots. Using your hands, gently tease this section apart from the main plant. If the roots are tightly tangled, use your sterilised knife to make a clean cut, ensuring each new division has an adequate root system. 4. **Repot Your New Plants:** Fill your new pots with a layer of fresh potting mix. Place a division in each pot, making sure the base of the plant is at the same level it was in the original pot. Fill in the sides with more potting mix, gently firming it down to remove air pockets. 5. **Water Thoroughly:** Give your newly potted anthuriums a good drink of water until it runs out of the drainage holes. This helps the soil settle around the roots.
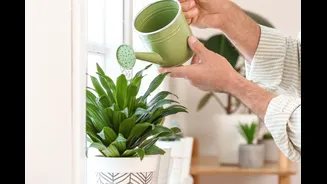
Caring for Your New Anthuriums
Your new plants might look a little sad or droopy for a few days as they recover from the shock of being divided. This is completely normal. Place them in a spot with bright, indirect light—direct sunlight will scorch their leaves. Keep the soil consistently moist but not waterlogged. Being tropical plants, they love humidity, which makes them well-suited for many Indian homes. You can mist them every few days or place them near a humidifier. Within a few weeks, you should see new growth, a sign that your propagation was a success.