



Tired of the same old roti? Imagine transforming a simple flatbread into a 'silky', layered, and satisfying meal. The Reshmi Paratha, with its unique texture and capacity for hearty fillings, does exactly that, turning dinnertime into an event.
What Makes a Paratha 'Reshmi'?
In Hindi
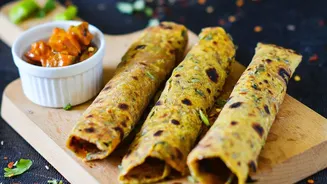
and Urdu, 'Reshmi' means silken. This name perfectly captures the essence of this paratha, which is prized for its incredibly soft, tender, and smooth texture. Unlike a standard paratha or chapati, the Reshmi Paratha achieves its signature silkiness through a special dough and layering technique. Often, the dough is enriched with ingredients like yogurt, milk, or even mashed potatoes, which create a wonderfully pliable and soft base. The magic is amplified during the rolling process. By applying ghee or oil and folding the dough into fine pleats before coiling and rolling it out, you create dozens of paper-thin layers that trap steam and become exceptionally soft when cooked. This process, similar to that of a Lachha Paratha, results in a flatbread that is both flaky and melt-in-your-mouth tender.
From Side Dish to Centrepiece
While a plain Reshmi Paratha is a delight on its own, its true potential is unlocked when it becomes a vessel for a hearty filling. The soft, layered structure is robust enough to hold a variety of stuffings, transforming it from a simple accompaniment into a complete and satisfying meal. This is where the headline's promise comes to life. Popular savoury fillings elevate the experience, turning the paratha into a portable, all-in-one dish. Imagine biting through the silky layers into a core of spicy minced meat (keema), creamy spiced cottage cheese (paneer), or a flavourful mash of mixed vegetables like potatoes, peas, and carrots. These fillings make it a perfect choice for a weekend brunch, a special dinner, or even a packed lunch, as it stays soft for hours.
Crafting the Silky Dough
The foundation of a perfect Reshmi Paratha is a soft, pliable dough. For this recipe, which incorporates potato for extra softness, you'll want to start with high-quality ingredients. You will need one cup of whole wheat flour (atta), one cup of all-purpose flour (maida), two medium-sized boiled and finely grated or pureed potatoes, one teaspoon of salt, and about two tablespoons of oil or ghee. In a large bowl, combine the flours and salt. Add the grated potato and mix it in thoroughly with your fingertips. The moisture from the potato is key, so you may need very little water. Add warm water, one tablespoon at a time, kneading until you form a smooth and soft dough that is not sticky. Knead for 5-7 minutes, then apply a little oil over the surface, cover with a damp cloth, and let it rest for at least 30 minutes. This resting period is crucial for relaxing the gluten, making the dough easier to roll and contributing to the final soft texture.
The Technique of Layering and Filling
Once the dough has rested, divide it into equal_sized balls. On a lightly floured surface, take one ball and roll it into a very thin circle, as large as you can manage. Brush the surface generously with melted ghee or oil. Now, for the layers: starting from one edge, begin folding the dough like a fan, creating tight pleats back and forth until you have a long, pleated strip. Gently stretch this strip and then roll it up from one end to the other to form a tight coil, tucking the loose end underneath. Now, gently flatten this coil with your palm. This is the stage to add your filling. Place a generous spoonful of your prepared keema, paneer, or vegetable mixture in the centre. Bring the edges of the dough together to seal the filling inside, creating a stuffed ball. Lightly flour the ball and carefully roll it out again to a paratha of about 6_7 inches in diameter, ensuring the filling doesn't spill out.
Cooking to Golden_Brown Perfection
Heat a tawa or a flat_bottomed pan over medium heat. Place the paratha on the hot tawa and let it cook for about a minute,, or until you see small bubbles appearing on the surface. Flip it over and apply a teaspoon of ghee or oil to the half_cooked side. Let the other side cook for another minute before flipping again. Now,, apply ghee to the second side. Press down gently with a spatula,, rotating the paratha to ensure it cooks evenly. Continue to flip and cook until both sides are a beautiful golden_brown and crisp,, with the layers visibly separating. The entire process should take about 3_4 minutes per paratha. Once cooked,, you can gently crush the hot paratha between your hands to fluff up the layers even more.