


Why Bother Making Your Own?
Store-bought coconut yogurts can be a delicious convenience, but they often come with a high price tag and a long list of additives like gums, starches, and preservatives to achieve their texture. When you make it at home, you are the quality control
expert. You choose the ingredients, control the sweetness, and can create a product that is pure, fresh, and packed with beneficial live probiotics. The process is simple and deeply rewarding, resulting in a yogurt that’s not only healthier but also often more flavorful than its commercial counterparts.
The Two Most Important Ingredients
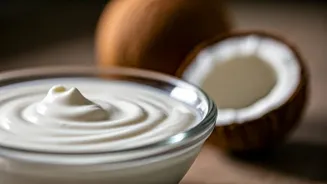
At its core, coconut yogurt requires just two things: coconut milk and a source of live cultures. Success hinges on choosing the right kind of each. For the coconut milk, you must use full-fat, canned coconut milk. Avoid cartons of coconut beverage or 'lite' versions, as the high fat content is essential for a thick, creamy final product. Look for brands with minimal ingredients, preferably just coconut and water. For the live cultures, you can use either a few tablespoons of a store-bought dairy-free yogurt as a starter, or the powder from a high-quality probiotic capsule. If using capsules, look for a brand with a high CFU count (Colony Forming Units), often around 50 billion, to ensure a strong fermentation.
Achieving That 'Ultra-Creamy' Dream
The secret to a luxuriously thick yogurt that isn't runny lies in a thickener. While some purists use only coconut cream skimmed from the top of a chilled can, this can produce an intensely rich result. For a more consistent and reliably spoonable texture, a natural thickener is your best friend. Options like tapioca starch, arrowroot powder, or agar agar are excellent vegan choices. Another popular option is unflavored grass-fed gelatin, which adds gut-health benefits of its own. The key is to dissolve the thickener in a small amount of the coconut milk before heating the full batch to avoid clumps and ensure a silky-smooth texture.
The Step-by-Step Process
First, ensure all your equipment—a glass jar, a non-metal spoon or whisk—is sterilized with boiling water or by running it through a dishwasher to prevent bad bacteria from contaminating your batch. Gently heat your coconut milk and dissolved thickener in a saucepan until it's just simmering. Let the mixture cool to a lukewarm temperature, around 110°F (43°C). A temperature that is too hot will kill the delicate live cultures you are about to add. Once cooled, whisk in your probiotic powder or yogurt starter until completely smooth. Pour the mixture into your sterilized jar, cover it with cheesecloth or a loosely fitted lid, and find a warm, draft-free spot for it to ferment. An oven with just the light on is a perfect incubation chamber.
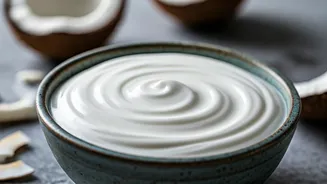
Patience and Fermentation
Let the yogurt ferment for anywhere between 12 and 48 hours. The duration depends on the warmth of your spot and your personal taste. A shorter time (12-24 hours) will result in a milder yogurt, while a longer ferment (up to 48 hours) will develop a more pronounced, tangy flavor, similar to traditional Greek yogurt. Check it periodically. Once it has reached the tanginess you prefer, give it a good stir. The yogurt will still appear quite liquidy at this stage, but don't worry. Place it in the refrigerator for at least 6 hours, or overnight. The chilling process is crucial—it's what allows the yogurt to set and achieve its final, thick consistency.
Troubleshooting and Storage
If your yogurt separates with a layer of liquid at the bottom, it's completely normal; simply stir it back together. If it's still thinner than you'd like after chilling, you can strain it through cheesecloth for a few hours to remove excess whey and create a thicker, Greek-style yogurt. If your yogurt develops any pink or grey discoloration or has an 'off' smell, it has been contaminated and should be discarded. Properly made, your homemade coconut yogurt will last for up to a week in an airtight container in the refrigerator.