





Why Go Vintage With Your Curls?
In an era of high-tech hair tools, turning to a decades-old method might seem counterintuitive. But the appeal of pin curls and other vintage setting techniques is twofold. First, there's the aesthetic. These styles create a soft, structured wave that
holds its shape beautifully, evoking the polished elegance of Hollywood's golden age. Second, and perhaps more importantly, it's a heat-free method. By letting your hair set naturally over time, you avoid the daily damage caused by hot rollers and curling irons. It’s a gentler, more intentional approach to hairstyling that prioritises hair health without sacrificing style.
The Essential Toolkit
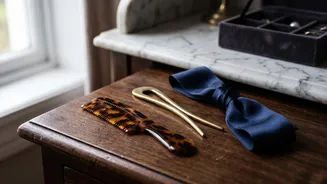
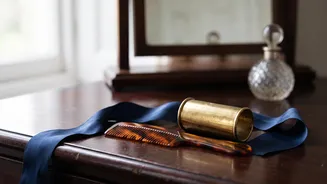
You don't need a professional salon's worth of equipment to get started. The beauty of these old-school methods lies in their simplicity. Here’s what you’ll want to have on hand: - A Fine-Tooth Comb: For creating clean, precise partings and smoothing sections. - Setting Lotion or Mousse: This is crucial. It gives the hair 'memory', helping it hold the curl shape as it dries. Apply it to damp, towel-dried hair. - Duckbill Clips or Bobby Pins: Traditionally, stylists used metal clips to hold the curls flat against the head while they set. - A Silk or Satin Scarf: Wrapping your hair while it dries protects the curls, tames frizz, and prevents them from coming undone, especially if you're setting them overnight.
Step-by-Step: The Perfect Pin Curl
Patience is key, but the process itself is straightforward. Start with clean, damp hair that has been treated with setting lotion. First, use your comb to create a small, neat section of hair, about one inch wide. The smaller the section, the tighter the curl. Comb the section smooth, from root to tip. Place your index finger at the end of the hair section and begin wrapping the hair around it, rolling upwards toward the scalp. Once you reach the root, slide your finger out, keeping the coil intact. Now, you have a flat, circular curl. Don't let it hang; instead, lay it flat against your scalp. Secure it firmly in place with a duckbill clip or two bobby pins arranged in an 'X' shape. Repeat this process across your entire head. The direction you wind the curls and the pattern you lay them in will determine the final style, so don't be afraid to experiment.
The Art of the Brush-Out
This is where the magic happens. Your hair must be 100% dry before you take the pins out. Any dampness will cause the curls to fall flat instantly. Once you're sure it's dry, carefully remove all the clips. Your hair will likely be in tight, separate ringlets. Don't panic! This is what it's supposed to look like. The final step is the brush-out. Using a boar bristle brush is often recommended as it helps smooth the hair and shape the curls into a cohesive wave pattern. Start brushing gently, and you'll see the tight coils relax into soft, rolling waves. You can use your fingers to help guide the hair into the desired shape.
Beyond the Pin Curl
The pin curl is the foundation for many vintage looks, but it's not the only technique. Finger waves, the iconic 'S'-shaped wave of the 1920s and 30s, are another classic style created on wet hair using just a comb, setting lotion, and your fingers to mould the hair into place. Another famous look, the Victory Roll, popular during the 1940s, involves creating large, voluminous rolls on either side of a central parting. While more advanced, they demonstrate the incredible versatility of these old-school setting techniques. Each one offers a unique way to connect with the past and create a truly standout look.