






Start With a Ruthless Edit
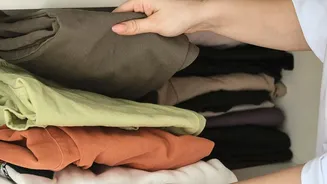
Before a single item gets packed away, you must declutter. There is no point in storing clothes you no longer love or wear. The seasonal transition is the perfect time to evaluate your wardrobe. Pull everything out and create three piles: keep, donate/sell,
and toss. Be honest with yourself. If you haven't worn an item in the last year and it holds no sentimental value, it’s time to let it go. This crucial first step ensures you're only storing clothes that deserve the space, making the entire process more manageable and your future self much happier.
Clean and Dry Before You Store
Packing away dirty clothes is a recipe for disaster. Even if garments look clean, invisible traces of sweat, body oils, or food stains can attract pests like moths and may set permanently over time. Wash or dry-clean every single item according to its care label before it goes into storage. Make sure everything is completely dry, as even a little moisture can lead to mildew, musty smells, and fabric damage. Do not use starch or fabric softener, as these can also attract pests. Taking this step protects your clothes and ensures they're fresh and ready to wear next season.
Choose the Right Containers
The right container is essential for protecting your clothes. While cardboard boxes are cheap, they attract pests and can disintegrate, so it's best to avoid them for long-term storage. Airtight plastic bins are a popular choice as they protect against moisture, dust, and insects. Clear bins are especially useful so you can get a quick glance at the contents. However, be aware that airtight containers can trap moisture if clothes aren't perfectly dry and may not be ideal for delicate natural fibers like wool, silk, or leather, which need to breathe. For these items, consider breathable fabric bins, cotton garment bags, or canvas boxes. For bulky items like winter coats, vacuum-sealed bags can save a lot of space, but they aren't recommended for delicate fabrics as they can cause permanent creases.
The Secret Weapon: An Inventory
This is the most important step to avoid losing track of what you own. Creating an inventory might sound tedious, but it's a game-changer. You can go low-tech with a simple notebook or a note-taking app on your phone, or you can use a spreadsheet. List each item as you pack it into a specific, numbered bin. For example: Bin #1 - Winter Sweaters (5 cashmere, 3 wool). For a more high-tech approach, consider a wardrobe inventory app like Indyx or Pureple, which allow you to create a digital closet by uploading photos of your clothes. This digital catalog makes it incredibly easy to see everything you own, plan outfits, and remember what's stored away.
Label Everything Clearly
Once your inventory is made and your clothes are packed, it's time to label. A vague label like ‘Winter Clothes’ won't help when you're searching for a specific scarf. Be descriptive. Your labels should align with your inventory list. For example: 'Bin #1: Winter Sweaters & Scarves' or 'Bin #4: Summer Dresses & Skirts'. Place labels on at least two sides of the bin so they are visible even when stacked. Using a consistent labeling system, perhaps even color-coding by season, makes finding what you need quick and painless.
Store Strategically and Safely
Where you store your clothes matters. The ideal location is cool, dark, dry, and well-ventilated. Attics and garages can experience extreme temperature fluctuations, while basements can be damp, so use these areas with caution. A spare closet or under-bed storage is often a great choice. To deter moths, you can add natural repellents like cedar blocks or lavender sachets to your storage containers. Just be sure they don’t directly touch the clothing. When arranging your bins, place heavier ones on the bottom and ensure you leave a walkway so you can easily access and read the labels on every container.