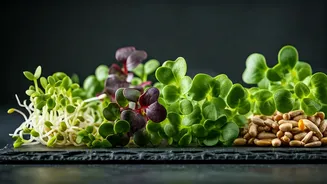


What Are Micro Veggies?
Before you start, let's clarify what we're growing. Micro veggies, or microgreens, are young vegetable greens harvested just after the first true leaves have developed. They are not sprouts. Think of them as the baby version of plants like mustard, radish,
or coriander. They are packed with flavour and are often more nutrient-dense than their mature counterparts. Their biggest advantage for city dwellers? They grow incredibly fast—often ready in 7-14 days—and require very little space, making them perfect for a small pot or tray on your balcony railing.
Your Balcony Starter Kit
You don’t need a fancy setup. Most of what you need is inexpensive and readily available online or at your local nursery. 1. **Shallow Trays:** Any shallow container (2-3 inches deep) with drainage holes will work. Plastic takeaway containers or seedling trays are perfect. 2. **Growing Medium:** A lightweight, soil-less mix is ideal. Look for cocopeat (nariyal ka bura), which holds moisture well and is widely available in India. You can also use a fine-potting soil mix. 3. **Quality Seeds:** Start with seeds meant for consumption, not just for planting in a large garden. Look for packets labelled 'microgreens' or use organic seeds of your favourite herbs and vegetables. 4. **Spray Bottle:** A simple water sprayer is essential for gently misting your delicate seeds and seedlings without dislodging them.
Best Micro Veggies for Indian Climates
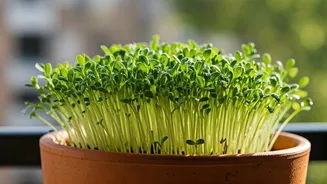
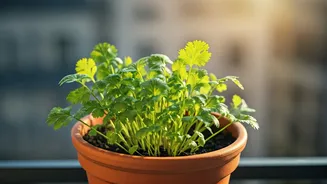
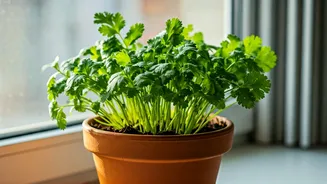
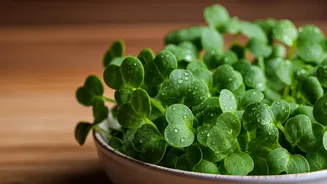
Not all veggies love the Indian sun, but many thrive. For beginners, it's best to start with crops that grow quickly and are relatively fuss-free. Here are some excellent choices: * **Mustard (Rai/Sarson):** Grows exceptionally fast, often ready in under 10 days. It has a sharp, peppery flavour. * **Fenugreek (Methi):** A staple in Indian kitchens, methi microgreens have a wonderfully fresh, slightly bitter taste. They are also very quick to grow. * **Radish (Mooli):** The greens have the same spicy kick as the mature radish root. They are colourful and add a zesty punch to salads. * **Coriander (Dhaniya):** This takes a little longer (15-21 days) but is well worth the wait for that unmistakable fresh flavour. To help germination, gently crush the seeds before sowing. * **Green Moong:** Easy and fast, moong microgreens have a mild, nutty taste and are packed with protein.
A Step-by-Step Planting Guide
Ready to get your hands dirty? It’s simpler than you think. 1. **Prepare the Tray:** Fill your shallow tray with about 1-2 inches of your growing medium (cocopeat or potting mix). Lightly press it down to create a flat, even surface. 2. **Moisten the Medium:** Use your spray bottle to thoroughly dampen the cocopeat. It should be moist like a wrung-out sponge, not waterlogged. 3. **Sow the Seeds:** Sprinkle your chosen seeds evenly and generously across the surface. You want them to be close together but not overlapping. There’s no need to bury them; just gently press them into the surface. 4. **Cover and Wait:** Lightly mist the seeds one more time. Cover the tray with another tray or a piece of cardboard to create a dark, humid environment that encourages germination. This is known as the 'blackout period'.
Daily Care and Finding the Right Light
Your tiny garden won't demand much. Check your seeds daily. After 2-4 days, you should see them starting to sprout. Once they do, it's time to remove the cover and introduce them to light. A typical Indian apartment balcony is perfect. They need indirect sunlight—direct, harsh afternoon sun can scorch the delicate leaves. A spot that gets 3-4 hours of gentle morning sun is ideal. Continue to mist them once or twice a day to keep the soil consistently moist but not soggy. The cocopeat will help retain moisture, making it a forgiving medium.
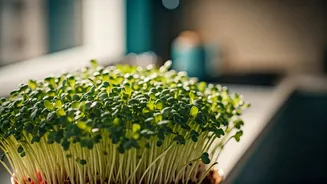
Harvesting and Enjoying Your Greens
This is the most rewarding part! Your microgreens are ready to harvest when they are about 2-3 inches tall and have developed their first set of true leaves (the second pair of leaves that appears). This usually takes between 7 to 14 days, depending on the variety. To harvest, use a clean pair of scissors and simply snip the greens just above the soil line. Rinse them gently, and they are ready to eat. Add them to your sandwiches, sprinkle them over dal and sabzi, blend them into smoothies, or use them as a beautiful, flavourful garnish for any dish.