






Choose the Right Lights and Bottle
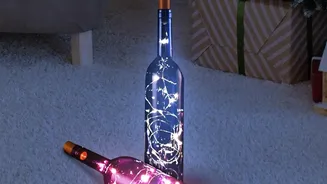
The success of your project starts with your materials. For safety and ease, always choose battery-operated LED fairy lights. They don't generate significant heat, which is crucial when placing electronics inside an enclosed glass space. You’ll find two
main types: those with a separate battery pack and those with the pack integrated into a cork-shaped stopper. The cork style is often the simplest, as it solves the problem of where to hide the power source. Lights with a thin, flexible copper or silver wire are ideal as they are easier to manipulate without putting stress on the connections. When selecting your bottle, choose one with a shape you love. Clear or lightly tinted glass works best to let the light shine through. Ensure the bottle's opening is wide enough for the lights, especially if you're using a string with a separate battery pack that you plan to conceal inside.
Prepare the Bottle Properly
Before you begin, your bottle must be perfectly clean and, most importantly, completely dry. Any residual moisture can be a hazard for the electronic components. Start by removing the labels. Soaking the bottle in hot, soapy water will often loosen the adhesive. For stubborn glue residue, a product like Goo Gone or a homemade paste of baking soda and oil can work wonders. To clean the inside, especially for bottles with narrow necks, you can use a mixture of salt or uncooked rice with a little soapy water. Cap the bottle and shake it vigorously; the grains will act as a gentle abrasive to scrub the interior. Rinse it thoroughly afterwards. Allow the bottle to air dry completely for at least 24 hours, placing it upside down on a rack to ensure all water has evaporated before inserting any lights.
Master the Insertion Technique
The key to avoiding wire damage is patience and a gentle touch. Don't simply try to stuff the entire string of lights in at once. This can create a tangled mess and put immense strain on the delicate wiring. Instead, begin feeding the light string into the bottle an inch or two at a time, starting from the end of the wire opposite the battery pack. To help guide the lights and arrange them artfully, use a thin, blunt object like a chopstick or a wooden dowel. This allows you to push sections of the wire into different areas of the bottle, preventing them from clumping at the bottom. As you feed more of the string in, gently turn the bottle to help the lights coil naturally around the inside walls. Avoid sharp bends or pulling the wire taut against the edge of the bottle opening.
Conceal the Battery Pack Neatly
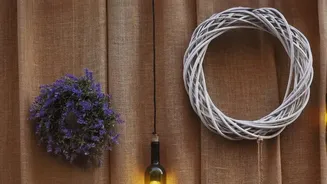
The final step is managing the battery pack, which can be an eyesore if not handled correctly. If you've chosen lights with a cork stopper, your work is already done. For lights with a separate battery pack, you have a few options. One popular method is to attach the pack to the back of the bottle using strong double-sided tape or Velcro dots, hiding it from frontal view. Another creative solution involves concealing the battery pack with decorative elements. You can wrap the neck of the bottle with ribbon, twine, or even a small floral arrangement to hide the pack. If the battery pack is small enough, you might be able to tuck it just inside the neck of the bottle, though this can make it difficult to access the switch. Taking a moment to plan this final step ensures a professional-looking and polished result.