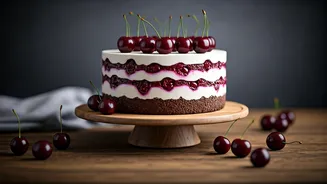


The Magic of No-Bake Desserts
The beauty of a no-bake dessert lies in its simplicity. It’s a method that sidesteps the precision and patience of baking, offering a straightforward path to a delicious finish. Especially in a country like India, where warmer weather can make turning
on an oven feel like a chore, a chilled dessert is the perfect answer. These recipes rely on cooling and setting rather than baking, using the refrigerator as the primary tool. They are forgiving, quick to assemble, and perfect for anyone who loves sweets but feels intimidated by complex baking projects. It’s all the reward with a fraction of the work, proving that you don’t need to be a pastry chef to create something truly special in your own kitchen.
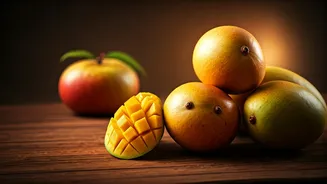
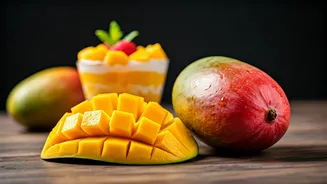
Meet the Star: No-Bake Mango Cheesecake
Our solution to the “sweet without fuss” dilemma is the magnificent no-bake mango cheesecake. This dessert is a celebration of flavour and simplicity. It pairs the tropical sweetness of ripe mangoes with the rich, tangy creaminess of cheesecake, all resting on a buttery biscuit base. There is no baking, no eggs, and no complicated techniques involved. You simply mix, layer, and chill. The result is a smooth, velvety dessert that looks and tastes like it came from a high-end bakery. It’s the perfect showstopper for a small gathering or a luxurious treat for yourself after a long day.
Gathering Your Simple Ingredients
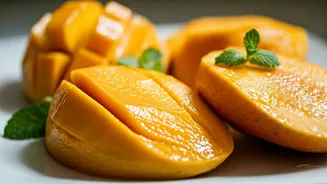
This recipe uses common ingredients that are easy to find. For the crust, you’ll need about 15 digestive biscuits or any simple tea biscuit and around 1/2 cup of melted unsalted butter. For the luscious filling, you will need 200g of full-fat cream cheese, softened to room temperature, and one cup of fresh, ripe mango puree. You'll also need 1/2 cup of powdered sugar, 1 cup of cold heavy whipping cream, and one tablespoon of gelatin or agar-agar powder to help it set. A splash of vanilla extract and a pinch of salt will round out the flavours beautifully.
Step 1: The Crumbly Biscuit Base
Creating the base is your first and easiest step. Take your digestive biscuits and crush them into a fine, sandy powder. You can do this by placing them in a sealed bag and rolling over them with a rolling pin, or by pulsing them in a food processor. Once you have fine crumbs, pour in the melted butter and mix until the texture resembles wet sand. Press this mixture firmly and evenly into the bottom of a 7 or 8-inch springform pan. Use the back of a spoon or the base of a glass to pack it down tightly. Place the pan in the refrigerator to chill and firm up while you prepare the filling.
Step 2: The Creamy Mango Filling
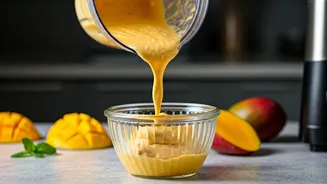
Now for the heart of the dessert. First, bloom your setting agent. Sprinkle the gelatin or agar-agar over three tablespoons of cold water in a small bowl and let it sit for about five minutes to soften. Meanwhile, in a large bowl, beat the softened cream cheese with the powdered sugar until it is completely smooth and free of lumps. In a separate bowl, whip the cold heavy cream until it forms stiff peaks. Gently fold the whipped cream into the cream cheese mixture. Now, warm the bloomed gelatin in the microwave for 10-15 seconds until it becomes liquid, then mix it into your mango puree. Finally, fold the mango mixture into the cream cheese and whipped cream base until everything is well combined and has a uniform, pale orange colour.
Step 3: Assemble, Chill, and Serve
Retrieve your chilled biscuit base from the refrigerator. Pour the creamy mango filling over the crust and spread it evenly with a spatula. To release any air bubbles and create a smooth surface, gently tap the pan on the counter a few times. Now comes the hardest part: waiting. Cover the cheesecake with plastic wrap and let it chill in the refrigerator for at least six hours, or preferably overnight. This time allows the cheesecake to set properly, ensuring clean slices and a perfectly firm texture. When you are ready to serve, you can garnish it with fresh mango cubes, a sprig of mint, or a sprinkle of crushed pistachios for an extra touch of elegance.