


Why Propagate in Water?
Before we get our hands dirty (or, in this case, wet), let’s talk about why water propagation is such a joy. For starters, it’s one of the easiest ways to multiply your plant collection for free. It’s also incredibly rewarding. Watching roots sprout and grow
in a clear glass vessel is a meditative, almost magical process. Unlike soil propagation, there’s no guesswork; you can see everything that’s happening. This visual feedback makes it a perfect entry point for aspiring plant parents. Plus, a collection of cuttings in assorted glass bottles creates a living art installation that’s both modern and timeless.
Gather Your Simple Supplies
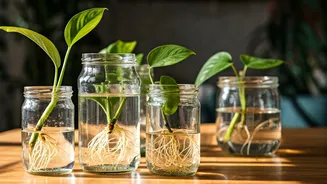
The beauty of this project lies in its simplicity and accessibility. You likely have most of what you need already. Here’s your checklist: * **Glass Bottles:** Raid your recycling bin! Wine bottles, kombucha bottles, fancy sauce jars, old perfume decanters, or even small spice jars work beautifully. The key is to find bottles with necks narrow enough to support the plant cutting but wide enough for roots to grow. * **Healthy “Mother” Plants:** You’ll need some existing houseplants that are ready for a trim. We’ll list the best options below. * **Sharp Scissors or Pruning Shears:** A clean cut is crucial for the health of both the mother plant and the new cutting. * **Water:** Room temperature tap water is usually fine. If your water is heavily treated, let it sit out for 24 hours to allow chlorine to dissipate.
Prepare Your Bottles
The goal is to make your upcycled bottles sparkle. Start by giving them a thorough wash with soap and hot water to eliminate any residue or bacteria. If you’re struggling with stubborn labels, a good soak in warm, soapy water can work wonders. For extra-sticky adhesive, apply a paste of baking soda and cooking oil, let it sit for 30 minutes, and then scrub it off. A clean bottle not only looks better but also provides a healthier environment for your new cuttings to develop roots. The clearer the glass, the better you can monitor root growth.
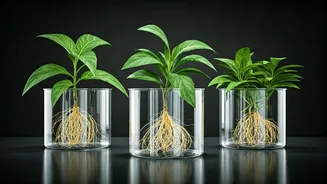
Best Plants for Water Propagation
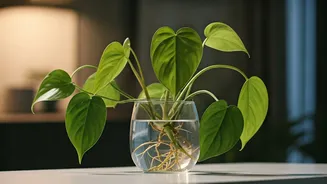
Not all plants take to water, but many common houseplants thrive in it. For the highest chance of success and the quickest results, start with these forgiving favourites: * **Pothos (Epipremnum aureum):** The undisputed champion of easy propagation. Golden, Neon, and Marble Queen varieties all root quickly. * **Philodendron:** Heartleaf Philodendron and Brasil Philodendron are incredibly eager to grow new roots. * **Spider Plant (Chlorophytum comosum):** Simply snip off one of the little “spiderettes” (the baby plants hanging off the main one) and place it in water. * **Snake Plant (Dracaena trifasciata):** You can propagate a leaf cutting, but be patient—it takes longer than vining plants. * **Monstera Deliciosa:** A single leaf with a node can grow into a whole new plant, offering a big impact from a small cutting.
The Art of the Cut
This is the most important step. Look for a healthy, mature stem on your mother plant. Identify a “node”—this is a small bump or joint on the stem where leaves and new roots will grow. For vining plants like Pothos and Philodendron, nodes are easy to spot. Using your clean scissors, make a cut about a quarter-inch below a node. Your cutting should ideally have at least one or two leaves and one node. Remove any leaves on the lower part of the stem that would otherwise be submerged in water, as they will rot and foul the water.
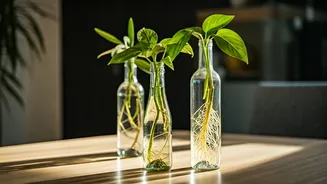
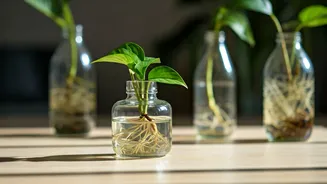
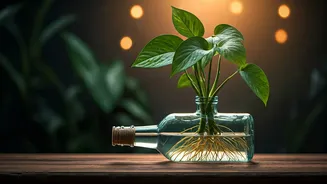
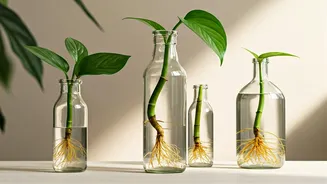
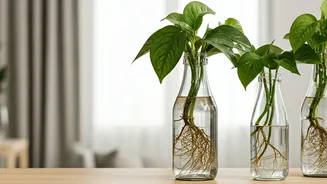
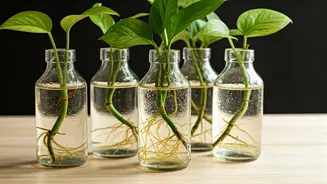
Assemble and Style Your Station
Now for the fun part. Fill your clean bottles with room temperature water. Gently place one cutting into each bottle, ensuring the node is fully submerged and the leaves are above the waterline. That’s it! You’ve officially created a propagation station. For a high-impact aesthetic, group bottles of varying heights and shapes together on a windowsill, bookshelf, or side table. A single, elegant bottle with one cutting can make a minimalist statement, while a cluster of three or five creates a lush, curated look. Play with different shades of green from various plants to add depth and texture. The key is to place them in a spot that receives bright, indirect light to encourage root growth.
Tender Loving Care
Your new cuttings don’t ask for much, but a little maintenance goes a long way. Change the water every 5-7 days, or whenever it starts to look cloudy. This replenishes oxygen and prevents bacterial growth. You should start seeing the first signs of white roots emerging from the nodes within a week or two, though some plants may take longer. Once a healthy root system of about one to two inches has developed, you can either keep the plant in water indefinitely or transfer it to a pot with soil.