



The Secrets to a Soft Dough
The foundation of a great naan is a soft, pliable dough. While traditionally a leavened bread, you can achieve excellent results without yeast by using chemical leaveners. The essential ingredients are all-purpose flour (maida), a leavening agent like
baking powder or soda, salt, a little sugar, and oil. However, the game-changing ingredient for tenderness is yoghurt (dahi). Yoghurt's acidity helps to tenderise the dough, resulting in a softer crumb and a subtle tang. Using full-fat, thick yoghurt is often recommended for the best texture. When combining your ingredients, use lukewarm water or milk; water that is too hot can negatively affect the texture, while lukewarm liquid helps create a smooth, supple dough.
Kneading and Resting: A Lesson in Patience
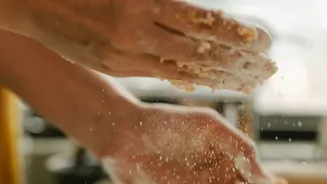
Once your ingredients are combined, the next step is kneading. The goal is a dough that is smooth and soft, and only slightly sticky. If it feels too wet, add flour sparingly; if it feels too dry, add a splash of water or milk. Be careful not to over-knead, as this can develop too much gluten and make the naan tough or rubbery. About 5 to 10 minutes of kneading by hand is usually sufficient. After kneading, the dough needs to rest. This is a crucial, non-negotiable step. Cover the dough with a damp cloth or plastic wrap and let it sit in a warm place for at least one to two hours. This resting period allows the gluten to relax, which makes the dough easier to roll and ensures the final naan is tender, not chewy.
Shaping and Rolling Your Naan
After the dough has rested, gently punch it down and divide it into equal-sized balls. For the classic teardrop shape, roll each ball into an oval and then gently stretch one end. Try to roll the dough evenly to about 1/8 or 1/4 inch thickness. Rolling it too thin can make it crispy, while rolling it too thick may prevent it from cooking through properly. For garlic naan, this is the time to add flavour. Finely minced garlic and chopped coriander can be pressed into the surface of the rolled dough. A key trick for tawa-cooking is to apply a thin layer of water to the back (non-garlic side) of the naan. This will help it stick to the hot pan.
The Tawa Cooking Technique
To mimic the high heat of a tandoor, you need a very hot tawa or cast-iron skillet. Do not use a non-stick pan, as the naan needs to adhere to the surface. Heat your tawa over a medium-high flame. Place the naan water-side down onto the hot pan, pressing gently so it sticks. You will see bubbles start to form on the surface within a minute or two. This is the leavening agent at work, creating those signature airy pockets. Once bubbles appear, the magic happens. Flip the entire tawa upside down and hold it a few inches over the open gas flame. Move it around to ensure the top of the naan cooks evenly and develops charred spots, just like a tandoor would. This process should only take about 30 seconds to a minute.
The Finishing Touch
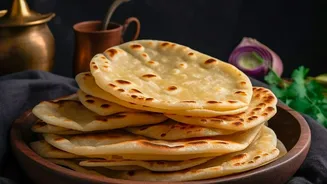
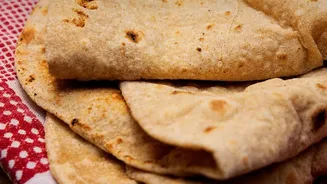
Once the naan has beautiful golden-brown and charred spots, use tongs to carefully remove it from the tawa. The final step is arguably the most delicious: brushing the hot naan generously with melted butter or ghee infused with more minced garlic and fresh coriander. This not only adds a final layer of flavour but also helps to keep the naan soft and moist. To ensure all your naans stay warm and soft while you cook the rest of the batch, stack them and keep them covered with a clean kitchen towel.