





Why Choose Origami for Your Walls?
Forget expensive canvases and generic prints. The ancient art of paper folding offers a refreshingly personal and budget-friendly way to decorate. Origami wall art is endlessly customisable; you can choose the colours, sizes, and shapes that perfectly
match your decor. The process itself is a form of mindfulness, a calming activity that results in a beautiful, handmade feature for your home. Whether you create a single statement piece or a sprawling, colourful installation, paper art adds texture, dimension, and a story to your walls that mass-produced decor simply cannot match. It’s an accessible craft for all skill levels, making it a perfect weekend project.
Gathering Your Simple Supplies
You don’t need a lot to get started with origami. The most important supply is, of course, paper. Standard origami paper, often called 'kami', is a great starting point. It’s lightweight, affordable, and comes in a huge variety of colours. For more durable pieces, consider using thicker paper or light cardstock, around 120-170 GSM (grams per square meter), which holds its shape well. Kraft paper offers a rustic, sturdy option, while washi paper provides traditional patterns and exceptional strength for more delicate designs. Beyond paper, you'll just need a flat surface for folding. For displaying your work, gather some scissors, a ruler, and a gentle adhesive like double-sided tape, sticky tack, or small pins.
Easy Shapes for Beginners to Try
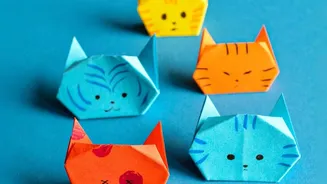
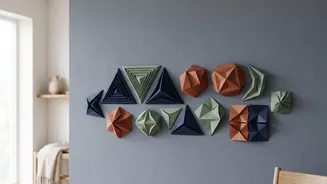
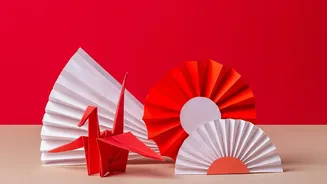
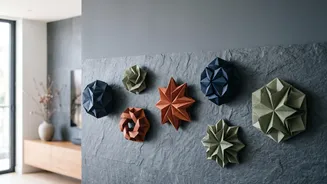
The beauty of origami is that even the simplest shapes can look dramatic when grouped together. Beginners can start with classic, easy-to-learn models that create a big impact. The traditional crane is a symbol of hope and a beautiful, elegant shape to master. Butterflies are another popular choice, requiring only a few simple folds to create a whimsical look. For a more modern, geometric aesthetic, try folding simple 3D pyramids, hexagons, or diamond shapes. These modular units, often called 'sonobe', can be interlocked to create larger, complex-looking structures. There are countless free tutorials available online for these foundational shapes.
Designing Your Paper Masterpiece
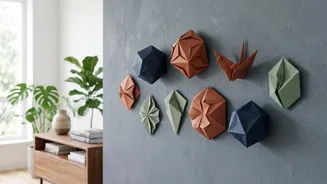
Once you've folded a collection of shapes, the next fun part is arranging them. Planning your layout is key to a cohesive look. A 'flock' of origami cranes or butterflies ascending a wall creates a sense of movement and grace. For a geometric display, you can arrange your shapes in a crisp, repeating pattern like a honeycomb or a chevron. Another idea is to create a mobile by attaching your paper creations to a stick or hoop with thread, making a beautiful hanging decoration. You can also arrange and glue your pieces onto a piece of cardboard or foam board, which can then be placed inside a shadow box frame for a more formal, gallery-style presentation. Play with colour gradients for an ombré effect or mix contrasting colours for a bold, graphic statement.
Hanging and Protecting Your Art
Since paper is lightweight, hanging your art is straightforward. For individual pieces, a small dot of removable adhesive tack or a piece of double-sided tape is usually sufficient. This allows you to rearrange your design without damaging your walls. For larger installations mounted on cardboard, use removable adhesive strips. To ensure your paper art lasts, placement is important. Avoid hanging it in areas with high humidity, like a bathroom without good ventilation, as moisture can cause the paper to warp or droop. Also, keep your creations out of direct, prolonged sunlight, which can cause the colours to fade over time. A light dusting with a soft, dry cloth or a can of compressed air from a distance can help keep them clean.