


Why Your Cat Needs a Vertical World
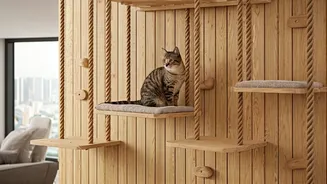
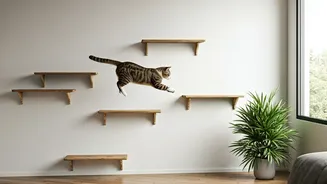
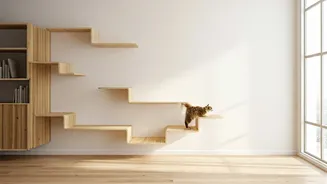
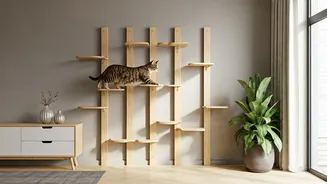
In the wild, cats are semi-arboreal creatures, meaning they thrive with access to high places. Climbing is not just play; it's a core part of their natural behaviour. Providing vertical territory in your home allows them to survey their environment from
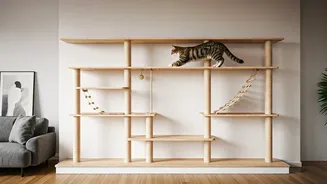
a safe vantage point, reducing stress and anxiety, especially in multi-pet households. Elevated spaces offer a secure retreat where they can rest without being disturbed. A 'cat superhighway'—a network of shelves, perches, and steps—encourages exercise, satisfies their instinct to climb, and can help prevent undesirable behaviours like scratching furniture or counter-surfing. By building upwards, you expand your cat's territory without taking up valuable floor space.
Planning Your Cat Superhighway
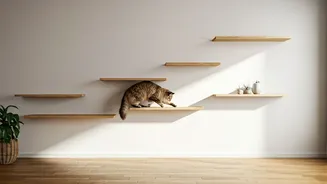
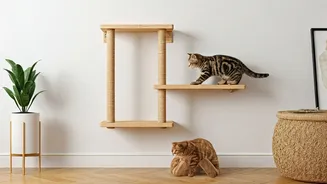
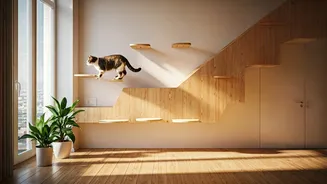
Before you drill a single hole, planning is crucial. First, choose a location. A wall in the living room leading up to a window perch or a quiet corner in a home office can work well. Observe your cat's current habits: where do they like to nap or watch birds from? Use painter's tape to map out the path on the wall. This helps you visualise the final look and ensure the spacing is correct. Cat steps should be spaced no more than 30-40 cm apart horizontally and 25-35 cm vertically. This allows for a comfortable and safe jumping distance. The planks themselves should be at least 20 cm deep to provide a stable landing and lounging spot. Ensure the path has a logical flow, with a clear 'up' and 'down' route.
Gathering Your Tools and Materials
Having everything on hand will make this project much smoother. You will need: * **Wood Planks:** Solid wood like pine or fir is a great choice. Aim for a thickness of at least 2.5 cm. Get them cut to your desired length at the hardware store to save time. * **Jute Rope:** Choose a thick, natural jute rope (around 6-8 mm diameter). This provides an excellent scratching surface. You'll need several metres per plank. * **Heavy-Duty Floating Shelf Brackets:** Do not compromise here. Select brackets rated to hold at least 20 kg each. You'll need two per plank. * **Tools:** A stud finder, power drill with appropriate bits, a level, measuring tape, and a staple gun with heavy-duty staples. * **Hardware:** Wall screws and anchors appropriate for your wall type (drywall, plaster, or brick). The brackets may come with these, but it's wise to buy high-quality ones separately.
Step 1: Preparing the Planks
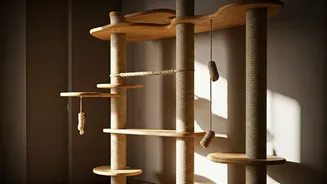
Start by preparing your shelves. Lightly sand the wood planks to remove any splinters and smooth the edges. You can stain or paint them at this stage if you wish, but ensure you use a pet-safe, non-toxic finish and let it cure completely. Once dry, it's time to wrap the jute. Start at one end of a plank, applying a small amount of wood glue (optional, for extra hold) and securing the end of the rope with a few staples from your staple gun on the underside of the plank. Begin wrapping the rope tightly and neatly around the plank, pushing each row snugly against the last. There should be no gaps. Every 10-12 wraps, secure the rope with another staple on the underside. When you reach the other end, cut the rope and secure it firmly with several staples.
Step 2: Mounting the Brackets Safely
This is the most critical step for safety. Use your stud finder to locate the wall studs in your chosen area. The strongest and safest way to mount shelves is by screwing the brackets directly into these wooden studs. Mark the stud locations with a pencil. Use your level and measuring tape to mark the exact placement for each bracket according to your plan. Pre-drill pilot holes for your screws. If a stud is not available exactly where you need a shelf, you must use high-quality drywall anchors rated for heavy loads. Toggle bolts or screw-in anchors are far superior to standard plastic plugs for this purpose. Always follow the weight-limit instructions for both your brackets and your wall anchors.
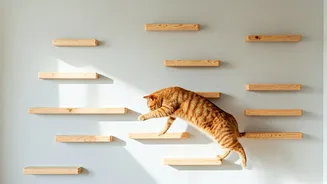
Step 3: Installing the Stairs
With your brackets securely fastened to the wall, the final step is to place your jute-wrapped planks on top. Most floating shelf brackets have screw holes on the underside to secure the plank. Use these to firmly attach each plank to its brackets. This prevents the shelf from tipping or sliding when your cat jumps on or off it. Once the first shelf is installed, give it a firm tug to test its stability. Proceed with the rest of your shelves, checking the level and alignment of each one as you go. Once all planks are mounted, do a final check of the entire structure to ensure everything is solid and secure before you invite your cat to test it out.