





Why Your Windowsill is Prime Real Estate
You don't need a sprawling garden or a dedicated grow room to cultivate fresh, healthy food. In fact, one of the best spots might be right in front of you: the windowsill. A windowsill provides the two most crucial ingredients for growing microgreens—light
and a stable temperature—for free. Its compact nature is a benefit, not a limitation. A small setup forces you to focus on a manageable number of plants, preventing overwhelm and making daily care simple. This contained environment is ideal for the rapid growth cycle of microgreens, which can go from seed to harvest in as little as seven to 14 days. By utilizing this small, sunny patch of your home, you create a hyper-efficient food production system that delivers flavour and nutrition with an incredibly small footprint.
The Essential Compact Setup
Getting started is simpler and less expensive than you might think. Forget complicated hydroponics or large, bulky equipment. A functional windowsill setup requires just a few key items. First, you'll need shallow trays; small 5x5 inch trays are perfect for windowsills and allow you to grow multiple varieties at once. Next, choose your growing medium. While potting soil is an option, many beginners prefer coco coir or sustainable bamboo fibre mats for a cleaner, less messy experience. These mats are placed in the tray, seeded, and watered. The final essential tool is a simple spray bottle for gentle watering, which prevents seeds from being displaced. Many companies now offer all-in-one kits that bundle everything you need, from trays to seeds, making the initial setup nearly effortless.
Choosing Your First Fast-Growing Greens
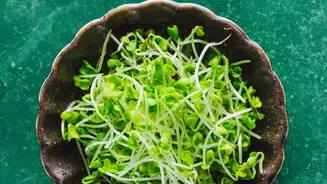
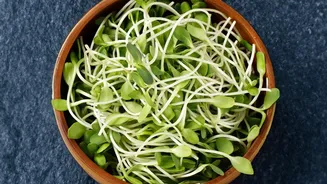
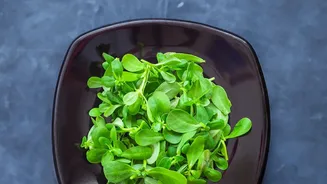
The key to a rewarding first experience is choosing varieties that are both fast and forgiving. Some of the easiest microgreens for beginners are also the quickest to grow. Radish microgreens are a popular choice, often ready for harvest in just seven days from germination and delivering a pleasant, spicy kick. Broccoli is another dependable option, known for its reliable germination and mild flavour. Other great beginner-friendly choices include different types of mustard greens, which grow quickly and add a zesty flavour to dishes. These varieties share common traits that make them ideal for a compact setup: they sprout within a day or two and have a short growth cycle, which means you see the rewarding results of your efforts in about a week.
From Seed to Sprout: Nailing Germination
Fast germination is the secret to a successful microgreen harvest. This initial stage is when the seed transforms into a sprout, and a few simple techniques can make all the difference. After spreading your seeds evenly on the moist growing medium, the next step is a brief 'blackout' period. This involves covering the tray with another tray or a dark lid for 24 to 48 hours. This darkness encourages the seeds to sprout uniformly as they search for light. During this time, maintaining consistent moisture is crucial. Use your spray bottle to gently mist the seeds once or twice a day. You’ll know the blackout period is over when you see a mat of tiny, pale sprouts. This initial burst of growth is the foundation for a healthy, dense tray of microgreens.
The Art of the Easy Harvest
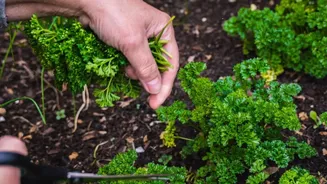
Harvesting your microgreens is the exciting final step. The perfect time to harvest is typically when the first set of leaves, known as cotyledons, have fully opened, and just before the 'true leaves' appear. This is usually between 7 and 14 days after planting. To harvest, you don't need special tools; a sharp pair of scissors or a clean knife will work perfectly. Hold a small bunch of greens with one hand and cut them just above the surface of the growing medium. It's best to harvest right before you plan to use them for maximum freshness and nutrient density. For longer storage, harvest the greens when they are dry—meaning, don't water them on harvest day—and place them in a sealed container in the refrigerator. Unlike other herbs, microgreens are a one-time harvest; after cutting, you can compost the mat and start a new tray.