


Knowing When It’s Time
Plants give clear signals when they’re ready for a new pot. The most obvious sign is roots growing out of the drainage holes at the bottom. Another clue is if you have to water your plant far more frequently than you used to; if the soil dries out in just
a day or two, it means there isn't enough soil to hold moisture. You might also notice that new leaves are smaller than older ones or that growth has slowed or stopped completely, especially during the spring growing season. If a plant looks top-heavy and unstable, or if you gently slide it out of its pot and see a dense, tangled mass of roots circling the bottom, it's definitely time for an upgrade. This condition, known as being 'root-bound', prevents the plant from absorbing the water and nutrients it needs to flourish.
Gather Your Supplies
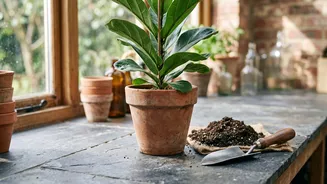
Before you begin, get all your tools ready to make the process smooth and minimize stress on the plant. You will need: a new pot that is slightly larger than the old one, fresh potting mix suitable for your plant type, a pair of scissors or pruning shears, and a small trowel or even just your hands. It's also a good idea to lay down some newspaper or a mat to catch any spilled soil, making cleanup much easier. If your plant is large, you might want a friend to help you handle it.
Choosing the Right Pot and Soil
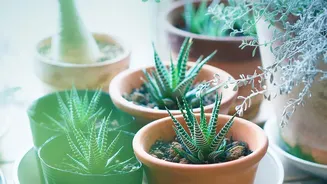
Selecting the right pot is crucial. Choose a new container that is only about one to two inches wider in diameter than the current one. A pot that is too large holds excess soil, which can retain too much water and lead to root rot. Ensure the new pot has at least one drainage hole; this is non-negotiable for preventing waterlogged soil. The material also matters. Terra cotta is porous and allows soil to dry out faster, making it great for succulents and plants that prefer drier conditions. Plastic or glazed ceramic pots retain more moisture, which is ideal for tropical plants that like to stay consistently moist. When it comes to soil, avoid using garden soil, which is too dense for containers. A good quality indoor potting mix is best. These are typically light and well-draining, often containing ingredients like peat or coco coir for moisture retention, and perlite or pumice for aeration.
The Step-by-Step Repotting Guide
With your supplies ready, it’s time to repot. First, gently remove the plant from its current pot. You may need to squeeze the sides of a plastic pot or run a knife around the inner edge to loosen it. Once it's out, examine the root ball. Gently loosen any tightly coiled or tangled roots with your fingers. If the roots are extremely compacted, you can make a few shallow vertical cuts with clean shears to encourage new outward growth. Next, add a layer of fresh potting mix to the bottom of the new pot. Place your plant in the center, ensuring it sits at the same depth it was in the old pot. Begin filling in the space around the root ball with more fresh soil, pressing it down gently to eliminate large air pockets without compacting it too much. Leave about an inch of space at the top to make watering easier.
Aftercare for a Happy Plant
After repotting, your plant will experience a period of adjustment known as transplant shock, which can cause some wilting or yellowing leaves. This is normal. To help it recover, water the plant thoroughly until you see water drain from the bottom holes. This helps settle the soil around the roots. After this initial watering, place your plant in a spot with indirect light, as direct sun can add more stress. Some sources advise waiting a week to water again to allow any damaged roots to heal, while others suggest keeping the soil consistently moist. The best approach is to monitor your plant and water when the top inch of soil feels dry. Finally, hold off on fertilizing for at least four to six weeks, as most fresh potting mixes contain nutrients and you want to avoid burning the sensitive, recovering roots.