
Understanding Indian Flours
Sourdough baking is a global passion, but success lies in local knowledge. While many online tutorials feature flours uncommon in India, our everyday staples—atta and maida—are more than capable of producing a fantastic starter. The key is understanding
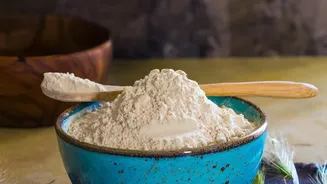
their unique properties. Atta, or whole wheat flour, contains the entire wheat kernel: bran, germ, and endosperm. This makes it rich in nutrients and wild yeasts, which can give your starter a quick, powerful launch. Maida, or all-purpose flour, is refined from just the endosperm. It’s softer and has less natural yeast, but it can create a lighter-coloured starter. Many Indian bakers find success using a blend of both.
Day 1: Starting the Journey
Your journey begins with two simple ingredients: flour and water. To start, you'll need a clean glass jar, whole wheat atta, and filtered water. In the jar, combine 50 grams of atta with 50 grams of water. Mix thoroughly until no dry flour remains, creating a thick paste. Cover the jar loosely—a cloth secured with a band or a lid placed on top without sealing it works well. This allows wild yeast to enter while keeping pests out. Place your jar in a warm spot in your kitchen, away from direct sunlight, for 24 hours. The ideal temperature is between 24-29°C, which makes many Indian kitchens perfect for fermentation.
Days 2-7: The Feeding Schedule
From day two, you begin a routine of discarding and feeding. This process strengthens the yeast culture. Each day, discard about half of the starter from the jar. Then, add 50 grams of fresh atta and 50 grams of water, mixing well. In India's warm climate, your starter may become active very quickly, sometimes within three to four days. You might notice bubbles and a pleasant, slightly fruity or tangy smell. By day five to seven, the starter should be reliably doubling in volume within a few hours of being fed. This predictable rise and fall is the most important sign of a healthy, bake-ready starter.
Signs of a Healthy Starter
How do you know your starter is ready for baking? Look for a few key signs. First, it will be very bubbly, with visible pockets of air throughout the mixture, not just on top. Second, it should have a pleasant, tangy aroma, sometimes described as smelling like yoghurt, fruit, or mild vinegar. Foul smells like nail polish remover indicate it is very hungry and needs to be fed. Third, and most importantly, it will reliably rise and at least double in volume within 4-8 hours after feeding. Once your starter shows this consistent pattern, it has enough strength to leaven bread.
Navigating the Indian Climate
India's warmth and humidity can be a double-edged sword. While it speeds up fermentation, it also brings challenges. During hot summer months or in humid coastal areas, your starter might ferment too quickly, becoming overly acidic. To manage this, you can use cooler water for feedings, feed your starter twice a day, or find a cooler spot in your home. High humidity can also make the starter too runny; if this happens, slightly reduce the amount of water in your feeding ratio. If you're not baking daily, your mature starter can be stored in the refrigerator and fed once a week to keep it healthy.
Troubleshooting Common Issues
Sometimes, things don't go as planned. If you see a layer of dark liquid (called "hooch") on top, don't panic. It simply means your starter is hungry. You can either stir it in or pour it off before the next feeding. However, if you see any pink or orange streaks, or fuzzy green, black, or white spots, this is a sign of mold or harmful bacteria. In this case, the starter cannot be saved and must be discarded. Thoroughly clean your jar and begin again. A sluggish starter that isn't rising can often be revived with consistent feedings or by adding a higher proportion of whole wheat flour for a nutrient boost.