





The Science of Freezer Burn
Freezer burn happens when moisture escapes from your frozen food and turns into ice crystals on the surface. This process, called sublimation, is when a solid (ice) turns directly into a gas without melting first. This moisture loss dehydrates the food,
leaving it dry, tough, and discoloured. While freezer-burned food is generally safe to eat, its quality takes a major hit. The taste and texture can be unappetizing, with meats becoming leathery and vegetables turning woody. The primary cause is exposure to the cold, dry air inside your freezer. When food isn't sealed properly, air gets in, and the process of dehydration and oxidation begins.
Why Air Is the Enemy
Oxygen is the main adversary in your battle for fresh frozen food. When air is trapped in a package, it does two things. First, it accelerates moisture loss, leading directly to the dry, icy state of freezer burn. Second, it causes oxidation, a chemical process that degrades the flavour, colour, and nutrients of your food. This is why meats might turn a grayish-brown colour or why the vibrant green of peas can become dull. By removing as much air as possible, you create an environment where it's much harder for moisture to escape and for oxygen to do its damage. This simple step is the single most effective way to preserve the quality of your food for months to come.
Method 1: The Basic Squeeze
The simplest method is often the first one we try. For foods stored in zip-top freezer bags, just press as much air out as you can before sealing the bag completely. This is a good starting point, especially for sturdy items like ground meat or chopped vegetables that can be flattened slightly to push air out. However, it's nearly impossible to remove all the air this way, and you risk crushing more delicate foods. While better than nothing, think of this as the most basic level of protection. For longer-term storage, more effective methods are recommended.
Method 2: The Straw Hack
For a significant upgrade with no special equipment, grab a simple drinking straw. Place your food in a zip-top bag and seal it almost all the way, leaving a small opening in the corner just large enough for the straw. Insert the straw, ensuring it doesn't touch the food, and suck the air out. You will see the bag shrink and conform tightly around the food. As you pull the straw out, quickly press the final corner of the bag shut. This technique removes far more air than squeezing alone and is a fantastic low-cost alternative to a vacuum sealer.
Method 3: The Water Displacement Trick
This highly effective technique uses the pressure of water to force air out of a bag. Fill a large pot or a sink with cool water. Place your food in a zip-top freezer bag and seal it almost completely, leaving a one-inch opening at the corner. Slowly lower the bag into the water. You will see the water pressure pushing the air out of the opening. Submerge the bag until just the unsealed corner is above the water line, then press the remaining section closed. Carefully lift the bag out and dry it thoroughly before placing it in the freezer. This method creates a near-vacuum seal without any special equipment.
Method 4: The Vacuum Sealer
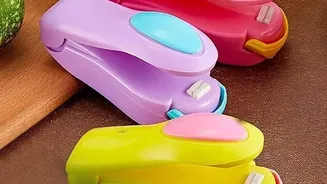
For the ultimate protection against freezer burn, a vacuum sealer is the gold standard. These appliances remove virtually all the oxygen from the packaging before creating an airtight seal. This method significantly extends the shelf life of frozen foods, keeping them fresh up to five times longer than ordinary storage methods. While it requires an initial investment in the machine and special bags, a vacuum sealer is invaluable for anyone who buys food in bulk, hunts, fishes, or simply wants the best possible preservation. It also helps save freezer space, as the tightly sealed packages are more compact and stackable.