






The Magic of Quick Pickling
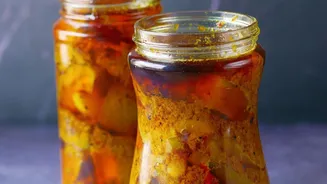
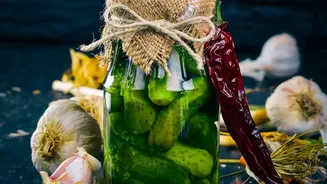
Unlike traditional 'achaar' making, which can involve days of fermentation or sun-drying, quick pickling is all about speed and simplicity. Often called 'refrigerator pickles', this method uses a vinegar-based brine to preserve and flavour vegetables.
The produce is steeped in a hot, seasoned brine and then stored in the refrigerator. There's no complex canning process or long waiting period. The result is a pickle that retains the crispness and fresh character of the vegetable, enhanced with a tangy, spicy kick. They are typically ready to eat within 24 hours and can be kept for several weeks in the fridge, making this a perfect entry point for anyone new to preserving.
The All-Purpose Pickling Brine
The heart of any quick pickle is the brine. While recipes vary, a reliable starting point for a balanced brine is a simple ratio. Many experts suggest a 1:1 ratio of vinegar to water, which provides enough acidity for preservation while not being overwhelmingly sharp. Another popular formula is the 3-2-1 method: three parts vinegar, two parts water, and one part sugar. To this liquid base, you'll add salt. It's crucial to use non-iodized salt like pickling salt or kosher salt, as table salt can make the brine cloudy and affect the final taste. For every two cups of liquid, a tablespoon of salt is a good measure to start with. Simply bring the vinegar, water, sugar, and salt to a boil, stirring until the sugar and salt dissolve, and your brine is ready.
Choosing Your Seasonal Stars
India's diverse seasons offer a fantastic palette of vegetables perfect for pickling. The key is to choose firm, fresh produce that holds its crunch. During winter, consider vegetables like carrots, radishes (gajar and mooli), cauliflower, and turnips. Monsoon brings an abundance of green chillies and cucumbers that are ideal for a spicy, tangy pickle. Onions, especially small shallots, are available year-round and transform into a delightful condiment that complements almost any meal. You can also experiment with green beans, sliced cabbage, or even ginger and garlic for a potent flavour boost.
Infusing an Indian Tadka
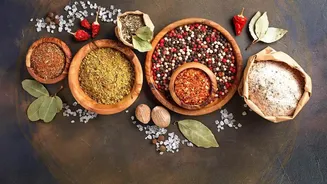
What makes these pickles distinctly Indian is the clever use of spices. You can add whole spices directly to your jars or bloom them in hot oil before making the brine for a deeper flavour. Classic Indian pickling spices include black mustard seeds (rai), fennel seeds (saunf), cumin seeds (jeera), fenugreek seeds (methi dana), and coriander seeds (dhania). A pinch of asafoetida (hing) adds a unique pungent note, while a small amount of turmeric powder (haldi) will give your pickles a beautiful golden hue. Don't be afraid to add fresh elements like sliced ginger, smashed garlic cloves, or whole green chillies directly into the jars for an extra layer of flavour and heat.
Your Step-by-Step Guide
1. Prepare Your Jars: Start with clean, sterilised glass jars with tight-fitting lids. You can sterilise them by boiling them in water for a few minutes or running them through a hot dishwasher cycle. 2. Prep the Vegetables: Wash your chosen vegetables thoroughly. Cut them into your desired shape—spears, slices, or florets. Pack them tightly into the sterilised jars. 3. Make the Brine: In a saucepan, combine your vinegar, water, sugar, and salt. Bring the mixture to a rolling boil, ensuring everything is dissolved. 4. Add Spices: You can add whole spices to the jar before the vegetables or add them to the hot brine. For a more intense flavour, briefly toast the spices in a dry pan until fragrant. 5. Combine and Cool: Carefully pour the hot brine over the vegetables in the jars, ensuring they are fully submerged. Let the jars cool to room temperature on the counter before sealing them with a lid. 6. Refrigerate: Once cooled, store the pickles in the refrigerator. While they can be eaten almost immediately, their flavour improves significantly after 24 hours.