






1. The Classic Two-Braid Halo
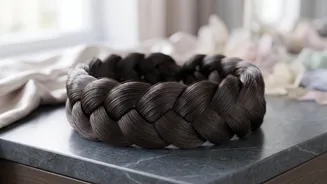
This is the foundational halo braid and the easiest method for beginners. It creates the illusion of a single, continuous braid wrapped around the head without the difficulty of braiding around your entire scalp. This style is perfect for medium to long
hair. Start by parting your hair down the middle, creating two equal sections. Braid each section into a simple, standard three-strand braid and secure the ends with small hair ties. Then, lift one braid, lay it across the top of your head like a headband, and secure it behind the opposite ear with bobby pins. Repeat with the other braid, laying it next to the first one and tucking the end underneath to hide it. A few more pins will ensure it stays in place all day.
2. The Dutch Braid Crown
For a more pronounced and voluminous look, the Dutch braid is the way to go. Unlike a French braid where you cross strands over the middle, a Dutch braid involves crossing them under. This technique makes the braid pop, sitting on top of the hair rather than blending in. To start, create a centre part. On one side, begin a Dutch braid at your forehead, following your hairline down toward your ear and the nape of your neck. Once you run out of hair to add, continue with a regular braid to the end. Do the same on the other side. Finally, wrap each braid up and over the top, pinning them securely to create a prominent, beautiful crown.
3. The Messy Bohemian Halo
Perfect for a relaxed, romantic, or festival-ready look, the messy halo braid embraces imperfection. The key is to add texture and volume. Begin by creating two pigtail braids, either standard or Dutch style. Once they are secured, gently pull on the edges of each braid loop. This technique, often called 'pancaking', makes the braids appear fuller and softer. Don't worry about flyaways; they add to the charm. After you’ve achieved the desired volume, wrap and pin the braids as you would for a classic halo. You can also pull a few face-framing tendrils out at the front to complete the effortless, bohemian vibe.
4. The Faux Halo for Shorter Hair
Having shorter hair doesn't mean you have to miss out on this trend. The 'faux' halo is a clever cheat that works wonderfully on bob or shoulder-length hair. Part your hair and create two small Dutch or French braids, one on each side, starting near your temples and braiding back towards the nape of your neck. Secure the ends with elastics. Because the braids are shorter, you won't wrap them over the top of your head. Instead, cross them at the back of your head, tuck the ends under, and pin them securely. It creates a beautiful half-halo effect that is both elegant and practical for shorter lengths.
5. The Twisted Halo
If braiding feels too complicated or you want a different texture, the twisted halo is a fantastic alternative. Instead of a three-strand braid, this style uses two-strand twists. Part your hair down the middle. On one side, take a section of hair near your forehead and split it into two. Twist them around each other, gradually adding more hair from your hairline into the twist as you work your way down. Once you reach the end, secure it with a tie. Repeat on the other side. The final step is the same: wrap the twists over your head and pin them in place to form your angelic halo. This version is often quicker than braiding and offers a softer, rope-like appearance.