


What Are Microgreens, Anyway?
Before we start, let's clarify what we're growing. Microgreens are not just sprouts. They are young vegetable greens harvested just after the first true leaves have developed. Think of them as the baby stage of plants like radish, kale, or mustard. They are prized
by chefs and health enthusiasts for two main reasons: intense flavour and concentrated nutrients. Studies have shown that microgreens can contain significantly higher levels of vitamins and carotenoids than their mature counterparts. Growing them yourself means you get the freshest possible harvest, bursting with goodness and free from pesticides.
Your Zero-Waste Starter Kit
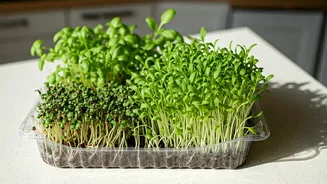
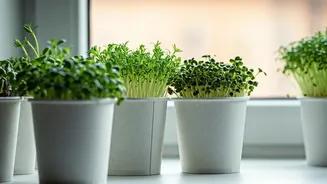
The beauty of this method is its simplicity and low cost. You likely have most of what you need already. Here’s your short shopping list: * **Cardboard Egg Cartons:** One or two will do. Avoid styrofoam or plastic, as cardboard is breathable and biodegradable. * **Microgreen Seeds:** Choose fast-growing varieties. Radish, broccoli, mustard, and arugula are fantastic for beginners. * **Growing Medium:** A small bag of potting mix or, even better, coco coir (which is sterile and reduces the risk of mould) is perfect. * **Spray Bottle:** For gentle watering. * **Scissors:** For harvesting your tiny crop. * **A Sunny Spot:** A windowsill that gets a few hours of sunlight is ideal.
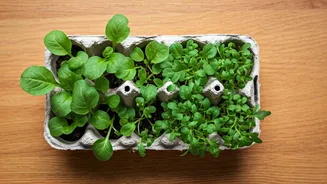
Step 1: Prepare Your Carton Planter
First, prepare your egg carton. If your carton has a tall, flimsy lid, you can cut it off and use it as a drip tray underneath. This helps catch any excess water and protects your windowsill. You don't need to poke drainage holes in the bottom of each cup; the porous nature of the cardboard and careful watering with a spray bottle will manage moisture levels effectively. Your main goal is to create a series of small pots ready to be filled. The carton will get damp, and that’s perfectly fine.
Step 2: Soil, Water, and Seeds
Now for the fun part. Fill each cup of your egg carton about three-quarters full with your chosen growing medium (potting mix or coco coir). Don't pack it down too tightly. Use your spray bottle to gently moisten the soil until it's damp but not waterlogged, like a wrung-out sponge. Next, sprinkle your seeds evenly over the surface of the soil. Don't be shy! You want a dense layer, as this ensures a lush, full harvest. Unlike planting in a garden, microgreens are happy to be crowded. Once seeded, give them another light misting of water to settle them in. There's no need to cover them with more soil.
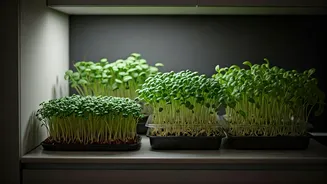
Step 3: The Growth Spurt
For the first two to three days, many seeds benefit from a 'blackout' period to encourage germination. You can achieve this by closing the lid of the egg carton or placing another carton on top. This tricks the seeds into thinking they are underground and encourages them to sprout. After about three days, you should see tiny shoots appearing. Now it’s time for light! Place your carton in a sunny spot. If you don't have a bright windowsill, a standard desk lamp will also work. Check your microgreens daily and mist them with water whenever the soil surface looks dry. In just a few more days, you'll see them transform into a tiny green forest.
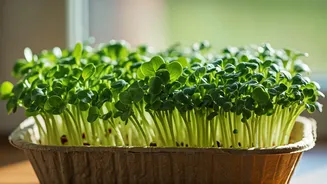
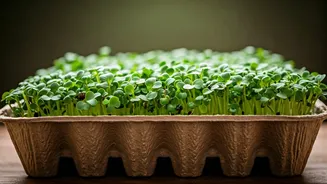
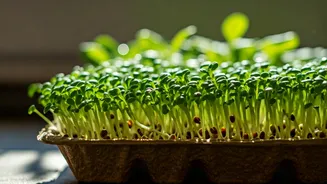
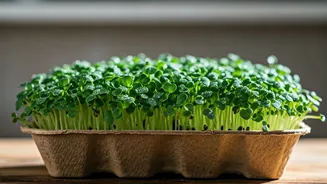
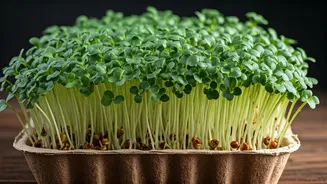
Step 4: Harvest and Enjoy
Depending on the variety, your microgreens will be ready to harvest in 7 to 14 days. You’ll know they are ready when they are about 2-3 inches tall and have developed their first set of 'true leaves' (the leaves that appear after the initial round 'cotyledon' leaves). To harvest, simply grab a pair of clean scissors and snip the greens just above the soil line. You can harvest a whole carton at once or trim what you need for each meal. Add them to salads, sandwiches, soups, or as a garnish on your dal or curry for a fresh, peppery, and nutritious kick. Once harvested, the roots and soil can be composted, and you can start a new batch in a fresh carton.