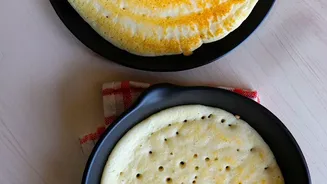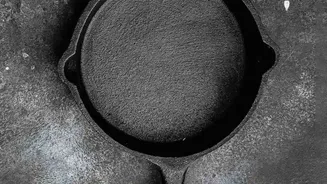






The magic of a perfect dosa lies in its texture: a golden, paper-thin crepe with an irresistible crunch. The secret weapon for achieving this at home is a cast-iron tawa, but only if it's properly seasoned. This guide makes that process simple.
Why Cast Iron Is Worth It
Before
we dive into the 'how', let's talk about the 'why'. Cast iron is celebrated in kitchens for its incredible heat retention and distribution. Unlike thinner pans that have hot spots, a heavy-bottomed cast-iron tawa heats up slowly and holds that heat evenly across its entire surface. This consistent temperature is crucial for cooking a thin layer of batter quickly and uniformly, which is the key to a crispy dosa. A well-maintained cast-iron tawa develops a natural non-stick surface, known as a patina, which improves with every use. This means you can say goodbye to dosas that stick, tear, or turn out pale and soft.
The Science of Seasoning
‘Seasoning’ isn't about flavour; it's a layer of polymerized oil that has bonded to the surface of the iron. When you apply a thin layer of oil and heat the pan, the fat molecules break down and fuse with the metal, creating a hard, slick, and protective coating. This coating is what gives your tawa its non-stick properties and protects it from rust, which is cast iron's natural enemy. Using too much oil is a common mistake that leads to a sticky, gummy surface instead of a smooth one, so remember that a very thin coat is always best.
Seasoning Your New Tawa: A Step-by-Step Guide
If you have a brand-new tawa, it needs to be prepared for its first use. Even if it says 'pre-seasoned', this process builds a stronger foundation. First, wash the tawa with a mild soap and water to remove any factory coating or dust. Then, dry it completely. Do not let it air dry, as this can cause rust. The best way is to wipe it with a cloth and then place it on the stove over low heat for a few minutes until all moisture has evaporated. Next, choose an oil with a high smoke point like sunflower, canola, or groundnut oil. Apply a very thin, even layer of oil to the entire surface—top, bottom, and handle—using a paper towel or cloth. Heat the oiled tawa on the stove over medium heat until it begins to smoke lightly, which takes about 10–15 minutes. Let it cool completely, wipe off any excess oil, and repeat the process two or three more times to build a durable initial layer.
Bringing an Old Tawa Back to Life
Found a rusty tawa in the back of your cabinet? Don't throw it away. You can easily restore it. Start by scrubbing off all the rust and any old, flaky seasoning using steel wool. A paste made of coarse salt and a little water or oil can also help lift stubborn grime. Once you're down to the bare metal, wash the tawa with warm, soapy water, dry it thoroughly on the stove, and then follow the same multi–layer seasoning process described for a new pan. This will strip it back to its original state and build a fresh, new non–stick surface.
From Seasoning to Sizzling: Cooking the Dosa
Now for the main event. Heat your seasoned tawa over a medium flame. To check if it's ready, sprinkle a few drops of water on it; they should sizzle and evaporate almost immediately. If the pan is smoking, it's too hot and your batter will cook instantly instead of spreading. Just splash some water on it and wipe it down to cool it slightly. For the first one or two dosas, it’s a good idea to rub the tawa with the cut half of an onion dipped in oil. This helps with the non–stick quality. Pour a ladle of batter in the center and spread it quickly in a circular motion. Drizzle a little oil around the edges, and wait for them to turn golden brown before lifting. The first couple of dosas might be 'sacrificial' as the seasoning settles, so don't be discouraged.
Easy Maintenance for a Lifetime of Use
Proper care is simple and ensures your tawa lasts for generations. After cooking, let the tawa cool down a bit. Avoid cleaning it with harsh soap, as this can strip the seasoning. For most cleans, a simple rinse with warm water and a gentle scrub with a soft brush is enough. If food is stuck, use a paste of coarse salt to scrub it off. The most important step is to dry it completely on the stove over low heat. Never let it soak in water. Once dry, apply another very thin layer of oil before storing it in a dry place. This protects it from moisture and rust.