


From Leftover to Legendary
Across India, from the plains of Andhra Pradesh where they are known as 'biyyam vadiyalu' to the kitchens of the north where they are 'chawal ke papad', the art of turning leftover rice into a shelf-stable snack is a testament to our culinary ingenuity.
It’s a beautiful tradition rooted in zero-waste philosophy, transforming something mundane into a delightful, crunchy treat that can be enjoyed for months. Forget store-bought snacks; the satisfaction of frying a papad you made from scratch, hearing that perfect crackle, and tasting the pure, unadulterated flavour is unmatched. This guide will walk you through every step, demystifying the process and ensuring your success.
Gather Your Simple Ingredients
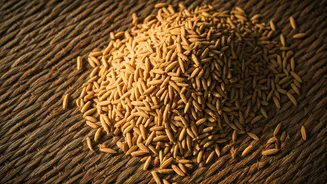
The beauty of this recipe lies in its simplicity. You likely have everything you need in your pantry already. For a basic batch, you will need: * **Cooked Rice:** About 1 cup. Any plain, cooked white rice works, whether it’s basmati, sona masuri, or a local variety. Day-old rice from the fridge is perfect. * **Water:** Approximately 2 to 3 cups, but the exact amount depends on your rice. * **Salt:** To taste. * **Flavourings (Optional):** This is where you can get creative. Cumin seeds (jeera), crushed black pepper, red chilli flakes, or sesame seeds (til) are all fantastic additions. Start with about 1 teaspoon of your chosen spice.
Step 1: Create the Perfect Rice Batter
The first crucial step is creating a smooth, lump-free batter. Take your leftover cooked rice and place it in a blender or mixie jar. Add about half a cup of water to start. Blend the rice until it forms a completely smooth, fine paste. You may need to stop and scrape down the sides a few times. If the mixture is too thick to blend, add a little more water, tablespoon by tablespoon. The goal is a texture similar to idli or dosa batter—smooth and flowing, but not watery. Once blended, transfer this paste to a heavy-bottomed pan.
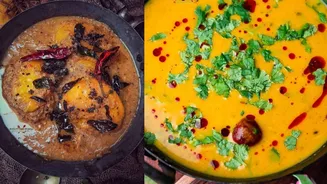
Step 2: Cook the Batter to a Glossy Finish
Now, add the remaining water to the pan with the rice paste, along with your salt and chosen flavourings. Whisk everything together thoroughly before you turn on the heat to prevent lumps. Place the pan on medium-low heat and begin stirring continuously with a spatula or whisk. This is the most important part of the process, requiring your full attention. The mixture will slowly start to thicken. Keep stirring, making sure to scrape the bottom and sides of the pan. After 10-15 minutes, the batter will transform from a milky liquid into a thick, glossy, and translucent porridge. A good test is to see if the mixture coats the back of a spoon. Once it reaches this stage, turn off the heat and let it cool down slightly for about 10-15 minutes. It will thicken further as it cools.
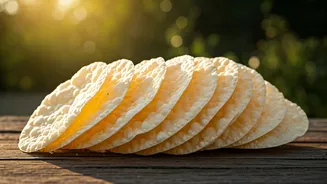
Step 3: Shape and Sun-Dry Your Papads
Prepare your drying surface. A clean plastic sheet, greased steel plates, or a silicone mat works best. Lay it out in a spot that receives direct, strong sunlight for most of the day. Once the batter is cool enough to handle, take a small spoonful and drop it onto the sheet. Use the back of the spoon or your fingers to gently spread it into a thin, even circle. The thinner you spread it, the crispier your papad will be. Repeat the process, leaving a little space between each papad. Let them dry in the harsh sun for 1-2 days. By the end of the first day, they should be dry enough to peel off the sheet and flip over to ensure the other side dries completely. They are ready when they are bone-dry, brittle, and translucent.
No Sun? No Problem!
Living in an apartment or facing a cloudy monsoon day doesn't mean you can't make these. You have two good alternatives. 1. **Fan Drying:** Spread the papads on a plate or sheet and place them directly under a ceiling fan running at high speed. It will take longer, about 2-4 days, but it works effectively. 2. **Oven Drying:** Preheat your oven to the lowest possible temperature (usually around 60-80°C). Place the papads on a baking tray lined with parchment paper and bake for several hours, with the oven door slightly ajar to let moisture escape. Check them frequently until they are completely dry and brittle.
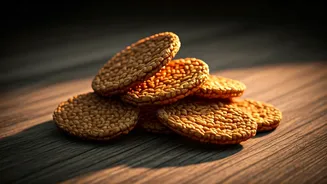
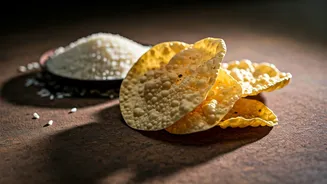
Storage and Frying to Perfection
Once your papads are thoroughly dried, they have a very long shelf life. Store them in a completely airtight container at room temperature. They can last for over a year, ready to be fried whenever you crave a crunchy snack. To fry, heat a couple of inches of neutral oil in a kadai or pan over medium-high heat. The oil is ready when a small piece of papad dropped in sizzles and rises to the surface immediately. Slide a papad into the hot oil. It will puff up and cook in just 3-5 seconds. Use tongs to quickly flip it, cook for another 2-3 seconds, and then remove it to a plate lined with a paper towel. Watch as it transforms from a tiny disc into a large, impossibly crispy wafer.