

The Magic of Glass Bottles
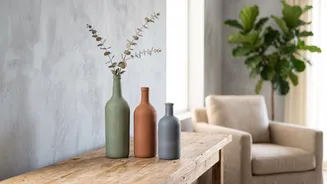
That empty wine bottle or forgotten glass jar holds immense potential. Instead of relegating them to the recycling bin, view them as the foundation for stunning new light fixtures. Glass bottles, with their varied shapes, sizes, and colours, can be transformed
into everything from simple accent lights to sophisticated table lamps. The beauty of this approach is its versatility; whether you prefer a rustic, minimalist, or eclectic aesthetic, there is a bottle project waiting for you. This kind of creative reuse is not only cost-effective but also a cornerstone of sustainable decor, allowing you to add a personal touch to your space while being kind to the planet.
Idea 1: The Effortless Glow Bottle
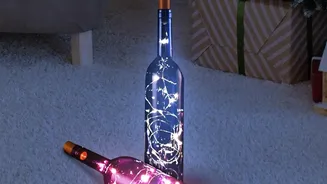
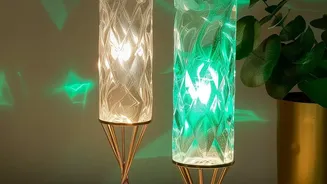
The simplest way to create a magical ambiance is by filling a clean, dry glass bottle with a string of battery-operated fairy lights. This method requires no tools or electrical knowledge, making it a perfect entry-level project. Choose bottles with interesting shapes or colours—blue gin bottles, green wine bottles, or clear jars all work beautifully. Simply feed the string of tiny LED lights into the bottle, leaving the small battery pack on the outside, often disguised as a cork. These glowing bottles are perfect for adding a warm, twinkling light to bookshelves, balconies, or bedside tables. Experiment with different light colours, from classic warm white to vibrant hues, to match your room's mood.
Idea 2: The Statement Bottle Lamp
For a more functional and permanent fixture, you can convert a beautiful bottle into a proper table lamp. This is more involved but yields a highly professional result. You will need a bottle lamp kit, which can be found online or at hardware stores and typically includes a socket, cord, and plug. The most common method involves drilling a small hole near the base of the bottle to thread the electrical cord through. This requires a special glass drill bit and a slow, careful process with water to keep the glass cool. Alternatively, some kits are designed to have the cord run directly out from the top, eliminating the need for drilling. Once wired, you can top it with a complementary lampshade.
From Scraps to Shades
Just as bottles can find new life, so can leftover textiles. Those fabric scraps from a sewing project, a beloved old saree that's too worn to wear, or a vibrant dupatta can be repurposed into a one-of-a-kind lampshade. This is a fantastic way to introduce colour, pattern, and texture into your decor, creating a piece that is perfectly coordinated with your existing furnishings. Instead of searching endlessly for the right shade in a store, you can create a custom piece that tells a story and reflects your personal style. It's an exceptionally rewarding project that turns textile waste into a functional work of art.
Idea 3: The No-Sew Fabric Shade
The easiest way to upcycle fabric is to give an old, plain lampshade a makeover. You can cut your fabric into long, uniform strips and simply wrap them around the existing shade, securing the ends with hot glue. Another popular method is decoupage, where you cut fabric pieces and apply them to the shade's surface using a craft glue like Mod Podge. This allows you to create a patchwork effect or feature specific patterns. For a gathered, cottage-style look, you can use a larger piece of fabric, glue it along the top and bottom rims, and create soft folds as you go. These no-sew techniques are quick, forgiving, and require minimal supplies.
Essential Safety and Finishing Tips
Safety should always be the top priority when creating your own lighting. For any project involving electrical wiring, always use a certified lamp kit and follow the instructions meticulously. If you are unsure about any step, it is best to consult a qualified electrician. When selecting bulbs, always opt for low-heat LED options, as they are safer for enclosed spaces like bottles and reduce any risk when used with fabric shades. For a polished look, ensure your bottles are thoroughly cleaned and all labels are removed before starting. A good soak in hot, soapy water usually does the trick. When working with fabrics, iron them first to ensure a smooth, professional finish.