







Face Your Main Light Source
The single most important change you can make for better video quality is to position your primary light source in front of you, not behind or above you. Whether it’s a window or a lamp, this light should illuminate your face. Many people make the mistake
of sitting with their back to a bright window, which forces the camera to expose for the bright light, turning you into a dark silhouette. Similarly, relying only on overhead ceiling lights can cast unflattering shadows under your eyes and nose. The simple fix is to reorient your setup so the main light is in front of you and slightly above eye level, which helps create a clear, detailed image.
Softer Light is Better Light
Harsh, direct light is the enemy of good video. It creates strong, unflattering shadows and can make you look washed out or shiny. The goal is to use soft, diffused light, which wraps around your facial features more gently. Professional videographers use softboxes, but you can achieve a similar effect for free. If your light source is a window with direct sun, you can soften it by drawing a sheer white curtain. If you're using a lamp, you can bounce the light off a white wall or ceiling instead of pointing it directly at your face. Another DIY trick is to place a semi-transparent material, like parchment paper, a safe distance from a lamp to scatter the light. The larger and softer the light source, the more professional you will appear.
The Best Position for Your Light
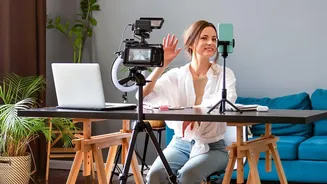
Once you have your soft light source in front of you, its exact placement matters. The most flattering position for your main light, or 'key light', is about 30-45 degrees to one side of your camera and slightly above your eye level, angled downward. This classic setup creates a gentle shadow on one side of your face, which adds definition and avoids the flat, lifeless look that can happen with a light placed directly in front of you. You don't need complicated equipment to achieve this. A simple adjustable desk lamp placed to the side of your laptop can work perfectly as your key light. This small adjustment in angle makes a huge difference in creating a more three-dimensional and professional appearance.
Use a Fill Light to Reduce Shadows
With a key light positioned off to the side, you might notice that one side of your face is brighter than the other. To balance this, you can introduce a 'fill light'. This second light source is less intense than your key light and is placed on the opposite side to soften the shadows created by the main light. A fill light doesn't need to be another powerful lamp. It can be a small desk lamp, a light from another room, or even a white piece of foam board or cardboard that bounces some of the main light back onto the darker side of your face. Another often-overlooked source of fill light is your computer monitor. Turn up the brightness of a blank white document on your screen to provide a gentle, frontal glow that can help reduce shadows under your chin and eyes.
Control Your Background and Color
Your camera's sensor is constantly trying to balance the light and color in the entire frame, not just on your face. A busy or very bright background can confuse the camera, causing it to incorrectly expose your face. A simple, neutral background helps the camera focus on you. Furthermore, it’s important to pay attention to color temperature. Your eyes are great at adjusting to different types of light, but a camera can struggle if you mix light sources, such as cool, blue-toned daylight from a window and warm, yellow-toned light from an indoor lamp. This can result in unnatural-looking skin tones. Whenever possible, try to use light sources with a consistent color temperature—either all daylight or all warm artificial light.