





The Effortless Voluminous Ponytail
A ponytail is a timeless classic, but it can sometimes feel a bit lacklustre. Clip-in extensions are the secret to transforming a simple pony into a statement. Start by putting in your clip-in wefts as you normally would, focusing on the back of your head
for maximum volume. Then, brush all your hair back and gather it into a high or low ponytail. For a polished finish, take a thin strand of hair from the ponytail, wrap it around the elastic band to conceal it, and secure it underneath with a bobby pin. This quick trick adds a touch of sophistication and makes the style look intentional and chic, perfect for work or a casual day out.
The Romantic Half-Up, Half-Down
The half-up, half-down style is incredibly versatile and flattering, keeping hair away from your face while still showing off its length. Apply the clip-in wefts mainly to the lower and middle sections of your head. Once they're secure, separate the top section of your hair, from temple to temple, and secure it with a claw clip or a chic scrunchie. For a softer, more romantic feel, use a curling wand to add loose waves to the lengths of your hair and the extensions, which also helps to seamlessly blend them together. You can pull out a few face-framing pieces to complete the relaxed look.
The Chic and Sleek Low Bun
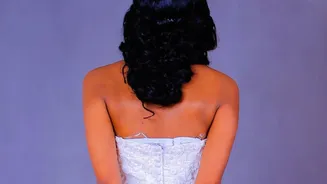
A low bun is the epitome of elegance, but it requires a bit of fullness to look truly polished. Clip-ins provide the necessary volume for a bun that looks luxurious rather than small. After applying your extensions, smoothly brush all of your hair back into a low ponytail at the nape of your neck. Twist the ponytail and wrap it around its base to form a neat bun, securing it firmly with hairpins. Using a light gel or smoothing cream can help tame any flyaways for a perfectly sleek finish. This style is sophisticated enough for a formal event but simple enough for a day at the office.
The All-Important Removal Process
How you remove your clip-ins is just as important as how you put them in. Rushed or careless removal is a common cause of hair breakage and can damage the extensions themselves. The key is to be gentle and patient. Never pull or tug at the wefts, especially if you feel resistance. Taking a few extra minutes at the end of the day will protect your natural hair and prolong the life of your extensions, ensuring you can use them time and time again.
Step 1: Locate and Unclip
Work in good lighting so you can see what you're doing. Gently section your hair to expose the wefts. Start with the highest weft and work your way down. Feel for each individual clip with your fingers. The most critical step is to make sure you press on the clip until it snaps fully open before attempting to move it. Many people make the mistake of trying to slide the weft out when the clip is only partially open, which causes hair to get caught and pulled.
Step 2: Slide Down, Don't Pull Out
Once a clip is completely open, it should release your hair easily. Instead of pulling the weft outwards, away from your head, gently slide it straight down along your scalp. This downward motion minimizes friction and prevents the clip’s teeth from snagging your hair. If you feel any snagging, stop immediately, double-check that the clip is fully open, and then try again. If you've used styling products like hairspray, a light spritz of detangling spray near the roots can help the clips slide out more smoothly.
Step 3: Post-Removal Care and Storage
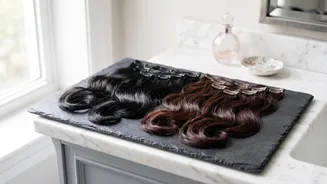
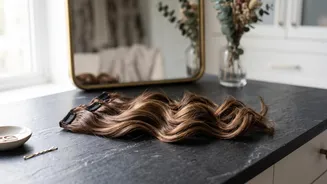
After all the wefts have been removed, gently brush your natural hair to remove any tangles. Then, take care of your extensions. Gently brush each weft, starting from the ends and working your way up, to remove any knots. Store them by laying them flat in their original box or a dedicated storage bag to keep them clean and prevent them from tangling. Proper storage is essential for maintaining their quality and ensuring they are ready for your next use.