

The Taste of Tradition
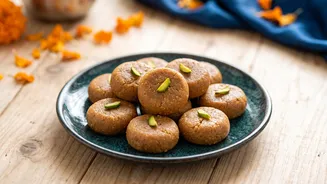
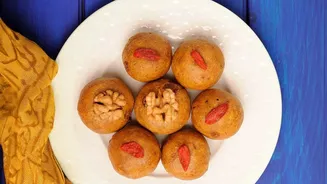
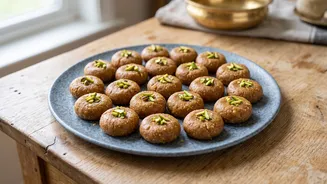
Mathura, the sacred city of Lord Krishna's birth, is not just famous for its temples but also for its iconic peda. Unlike the common white peda, the Mathura-style version has a distinctive dark, caramelised colour and a uniquely granular texture. This
comes from patiently roasting khoya (milk solids) until it turns a rich brown, a process that gives the sweet its signature flavour. Legend suggests that the peda is one of Lord Krishna's favourite sweets, making it an essential part of the prasad, or religious offering, during Janmashtami celebrations. Preparing this at home is not just about making a sweet; it is about connecting with a tradition that is centuries old and steeped in devotion.
Gather Your Divine Ingredients
The beauty of Mathura Peda lies in its simplicity. You only need a few core ingredients to create this divine offering. For this recipe, you will require: - 250 grams Khoya (Mawa), unsweetened and preferably fresh - 200 grams Tagar or Boora (specialised crystalline sugar) - 3 to 4 tablespoons Ghee (clarified butter) - 1/2 teaspoon Cardamom powder - A pinch of Nutmeg powder (optional) Khoya, or milk solids, is the base of this sweet. For the best results, use fresh, soft khoya. If your khoya is dry or hard, you can grate it and add a splash of milk to soften it. The sweetener, Tagar or Boora, is crucial for the authentic texture. It is a form of crystallised sugar that is more porous than regular powdered sugar, which helps give the peda its characteristic melt-in-the-mouth feel. You can find it at most Indian grocery stores or even make it at home.
The Art of Roasting the Khoya
This is the most critical and time-consuming step, but it is where the magic happens. Start by crumbling or grating the khoya. Place a heavy-bottomed pan or kadhai on low to medium heat. Add the khoya and begin to roast it, stirring continuously to prevent it from sticking or burning. As it heats, the khoya will melt before it starts to thicken again. After about 10-15 minutes, you will notice it turning a light brown. At this point, add a tablespoon of ghee at a time whenever the mixture looks too dry. Continue roasting and stirring for a total of 25-30 minutes, or until the khoya achieves a deep, uniform, golden-brown colour and releases a rich, nutty aroma. Patience is key here; rushing this process on high heat will burn the khoya and spoil the taste.
Mixing and Shaping the Pedas
Once the khoya is perfectly roasted, turn off the heat but keep stirring for another minute as the pan will still be hot. Let the mixture cool down until it is just warm to the touch—not hot, but not completely cold. If you add the sugar when the mixture is too hot, it will melt and make the mixture runny. If it's too cold, the sugar won't incorporate properly. Transfer the warm khoya to a bowl. Add the cardamom powder, nutmeg powder, and most of the tagar, reserving a few tablespoons for coating the pedas later. Mix everything thoroughly with your hands until the sugar is well combined. The mixture should come together into a pliable dough. If it feels too dry, you can add a teaspoon of milk to help it bind.
The Final Touch
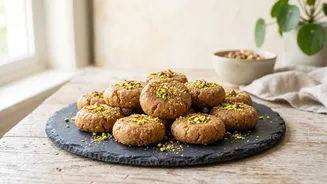
Now, it is time to shape your offerings. Take small, lemon-sized portions of the mixture and roll them between your palms to form smooth balls. The traditional Mathura Peda is not perfectly round but has a slightly irregular, rustic shape. You can gently flatten each ball with your thumb to create a small indentation. Once shaped, roll each peda in the reserved tagar or powdered sugar until it is lightly coated on all sides. This final coating gives the peda its classic appearance and an extra touch of sweetness. Arrange the finished pedas on a plate. They are now ready to be offered as bhog or enjoyed with family.