





The magic of a homemade scented candle lies in its steady, fragrant glow. But this success often hinges on one crucial detail that is easy to overlook: the placement of the wick. Getting it right is the secret to a perfect candle.
Why Wick Placement is Everything
Think of the wick as
the engine of your candle. It's not just a string; it's the component responsible for drawing up melted wax to fuel the flame. Its position determines how the candle performs, from the way it burns to the scent it releases. When a wick is perfectly centered, it creates a symmetrical pool of melted wax, allowing the candle to burn evenly and release its fragrance effectively. An off-centre wick, however, leads to a host of problems. It can cause the flame to be too close to one side of the container, creating a safety hazard by heating the glass unevenly. This thermal stress can cause the glass to crack or even shatter. An improperly placed wick also leads to an uneven burn known as 'tunnelling', where the flame burns straight down the middle, leaving a ring of unused wax around the edges and significantly shortening the candle's life.
First, Choose the Right Wick Size
Before you can place your wick, you must choose the right one. Wick size is not one-size-fits-all; it depends on the diameter of your container, the type of wax you're using (soy, paraffin, beeswax, etc.), and even the amount of fragrance oil. As a general rule, a wick that is too small for its container won't generate enough heat to melt the wax to the edges, resulting in tunnelling. Conversely, a wick that's too large will create an oversized flame, leading to excess soot, smoke, and a candle that burns far too quickly. Most suppliers provide wick sizing charts that recommend a starting point based on your jar's diameter. It is always a good idea to perform a test burn with your chosen wax and fragrance combination to ensure you have the perfect match.
The Art of Perfect Centering
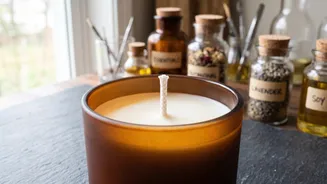
Achieving a perfectly centered and straight wick requires a two-point approach: securing the bottom and holding the top. To anchor the wick's metal tab to the bottom of your clean, dry jar, you can use a dab of hot glue or a purpose-made wick sticker. Press the tab firmly into the absolute center of the container. Looking down from directly above is the best way to judge the center. Once the base is secure, you need to keep the wick taut and straight while you pour the hot wax and it cools. Specialised tools like wick bars or centering tools are designed for this, resting across the jar's rim and holding the wick in a notch. However, simple household items like clothes pegs, popsicle sticks, or even pencils laid across the jar opening can work just as well to keep the wick in its place while the wax solidifies.
Going Big: When to Use Multiple Wicks
For wider containers, a single wick simply isn't enough to achieve an even melt pool. As a rule of thumb, any container wider than about 3.5 inches will likely need more than one wick. Adding a second or third wick helps distribute heat across the entire surface, preventing tunnelling and making for a more aesthetically pleasing burn. A common guideline is to add one wick for every inch of diameter past three inches; for instance, a 4-inch jar would need two wicks, while a 5-inch jar might need three. When placing multiple wicks, ensure they are spaced evenly from each other and from the sides of the container. For a two-wick candle, place them symmetrically. For a three-wick candle in a round jar, a triangular pattern is effective. Just remember that when using multiple wicks, you'll need to use smaller wick sizes than you would for a single-wick candle of a similar diameter.
Troubleshooting and Safety
Even with careful preparation, wicks can sometimes shift. If you notice after burning that your wick is off_center, extinguish the flame immediately. You can often gently nudge the wick back toward the center using a pair of tweezers while any wax is still melted. Allow any wax to fully harden before relighting. A well_placed wick is also a safer wick. It prevents any flame from getting too close to any glass, which can cause overheating and potential breakage. It also promotes any steady, manageable flame, reducing any risk of excessive soot or smoke. Always burn your homemade candles on any stable, heat_resistant surface, away from any drafts, children, and pets, and never leave any burning candle unattended.