


The 'Trick' Is Actually A Tradition
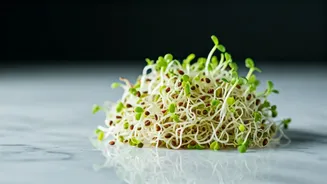
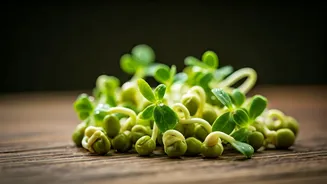
The secret isn’t a complicated kitchen gadget or a fancy cooking method. It’s the simple, age-old process of sprouting. This 'trick' involves taking dry legumes, grains, or seeds and germinating them at home by soaking and rinsing them over a few days.
Instead of buying pre-packaged sprouts that may be losing their freshness, you control the entire process. This method turns your kitchen into a mini-farm, producing some of the most nutrient-dense food you can eat. It’s a return to basics, a technique our grandparents likely knew well, that unlocks a whole new level of nutrition from everyday ingredients like moong, matki, and chana.
Why Nutrition Fans Are Obsessed
Sprouting isn't just a trend; it's a nutritional upgrade backed by science. When a seed germinates, its nutritional profile changes dramatically for the better. The process breaks down anti-nutrients like phytic acid, which can bind to minerals and prevent their absorption. With these anti-nutrients reduced, your body can more easily access the iron, magnesium, and zinc in the food. Sprouting also significantly increases the levels of vitamins, particularly B vitamins and Vitamin C. Furthermore, the complex starches within the seed are converted into simpler sugars, making sprouts much easier to digest and less likely to cause bloating or gas compared to their un-sprouted counterparts. Essentially, you are eating a tiny, living plant at its peak nutritional moment.
Your Simple Guide to Sprouting at Home
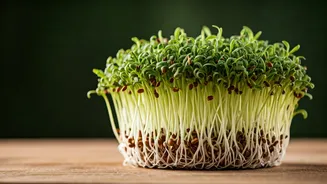
You don't need special equipment to start sprouting. A glass jar, a clean piece of muslin cloth, and a bowl are all you need. Here’s a simple method using moong beans, which are perfect for beginners: 1. **Rinse and Soak:** Take about half a cup of whole moong beans and rinse them thoroughly. Place them in a large bowl and cover with at least double the volume of water. Let them soak overnight, or for about 8-12 hours. 2. **Drain and Rest:** The next morning, drain all the water. Rinse the beans again. Now, place them in a colander, or tie them loosely in a clean muslin cloth. Place the colander in a bowl or hang the cloth in a spot away from direct sunlight, allowing air to circulate. 3. **Rinse and Repeat:** Rinse the beans with water twice a day (morning and evening), draining thoroughly each time. This keeps them moist and prevents them from spoiling. 4. **Harvest:** Within 24-48 hours, you'll see small white tails emerging from the beans. Your sprouts are ready! You can let them grow longer for a crunchier texture. Store them in an airtight container in the fridge for up to a week.
Beyond Moong: What Else Can You Sprout?
Once you've mastered moong, the world of sprouting is your oyster. Many other legumes and seeds found in an Indian kitchen are excellent candidates. Try sprouting moth beans (matki) for making missal, black chickpeas (kala chana) for a protein-packed salad, or lentils (masoor) for a mild, earthy addition to soups. You can even sprout grains like ragi or seeds like alfalfa and fenugreek (methi). Each has a unique flavour profile and set of benefits. Sprouting fenugreek, for example, can help mellow its bitterness and is often recommended for its blood sugar-regulating properties. Just remember that different seeds have slightly different soaking and sprouting times.
How to Weave Sprouts into Your Diet
The beauty of fresh sprouts is their versatility. You can eat them raw, steamed, or lightly cooked. Toss a handful of raw moong sprouts into a kachumber salad with chopped onion, tomato, and a squeeze of lime for a refreshing crunch. Add them as a garnish to poha or upma for a nutritional boost. Lightly steam them and make a simple sabzi with minimal spices. You can even blend them into dosa or cheela batter. For a classic snack, make a sprouts chaat with boiled potatoes, chaat masala, and a drizzle of chutney. By having a batch ready in your fridge, you have a quick and easy way to add protein, fibre, and vitamins to almost any meal.