




Choosing Your Flour: Atta, Maida, or Both?
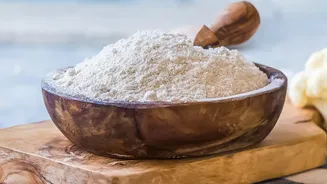
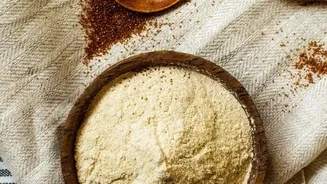
The heart of your starter is the flour. While many recipes online call for bread flour, common Indian flours work wonderfully. Whole wheat atta is excellent for getting a starter going because its bran contains abundant natural yeasts. This can make your starter become
active faster, sometimes in just a few days, thanks to India's warmer climate. Maida (all-purpose flour) can also be used, but it may take a little longer to show activity. Many bakers find success using a 50/50 blend of atta and maida, which offers the microbial boost of whole wheat and the lighter texture of refined flour. For your first attempt, starting with 100% atta is a reliable choice.
Your Simple Starter Toolkit
You don't need to buy any special equipment. All you need is a clean glass jar (an old coffee or pickle jar is perfect), a spoon for mixing, and a kitchen weighing scale for accuracy. Using a scale to measure your flour and water by weight is more precise than using cups. You'll also need filtered or bottled water, as the chlorine in some tap water can inhibit the growth of the good microbes you're trying to cultivate.
Day 1-2: The Beginning
Let's begin. In your clean glass jar, combine 50 grams of atta flour and 50 grams of filtered water. Mix them thoroughly until you have a thick, smooth paste with no dry bits of flour left. Cover the jar loosely—a lid placed on top without sealing, or a small piece of cloth works well. You want air to get in, but not dust or pests. Leave the jar on your kitchen counter in a relatively warm spot for 24 hours. You might not see much happening on the first day, but by the end of day two, you may notice a few small bubbles.
Day 3-5: The First Signs of Life
Now, we begin the feeding routine. Your starter will likely have a few bubbles and may smell a bit funky; this is normal. It's time for the first 'discard and feed'. Remove and discard about half of the starter from the jar. To the remaining starter, add 50 grams of atta and 50 grams of water. Mix well, cover loosely, and leave it for another 24 hours. From Day 4 onwards, you should switch to feeding it twice a day, roughly 12 hours apart, especially in a warm climate. This prevents the starter from getting too hungry and acidic.
Day 6-7 and Beyond: Building Strength
By now, you should see a pattern. Your starter will rise and become bubbly a few hours after feeding, and then it will fall. This is the rhythm of a healthy, active starter. The smell should also be changing from something unpleasant to a more fruity, tangy, or yeasty aroma. Continue your twice-daily feeding schedule: discard about half, then add 50g atta and 50g water. Some starters are ready in 7 days, while others might take up to 10 or 14 days to become strong and predictable. Patience is key.
Is My Starter Ready to Bake?
Your starter is ready when it reliably doubles or even triples in volume within 4 to 8 hours of being fed. It will look spongy, airy, and full of bubbles, both large and small. A popular way to check is the 'float test'. Drop a small spoonful of your active starter into a glass of water. If it floats, it’s full of gas and ready to leaven your first loaf of bread. If it sinks, it likely needs a few more days of consistent feeding to build more strength.
Long-Term Care and Maintenance
Congratulations, you have a living sourdough starter! If you plan to bake often, you can keep it on your counter and continue the daily feeding schedule. If you bake less frequently, you can store your starter in the refrigerator. A refrigerated starter only needs to be fed once a week to keep it alive. Just remember to take it out and feed it a couple of times at room temperature to get it active and bubbly again before you plan to bake.