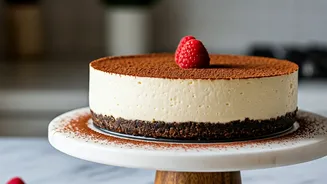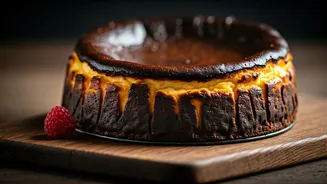


The Foundation: A Flawless Chocolate Crust
A great cheesecake starts from the bottom up. A soggy or crumbly crust can undermine the entire dessert. For a crisp, sturdy base that complements the rich filling, we’re using chocolate biscuits, like Oreo cookies (filling and all) or Bourbon biscuits.
The key is to crush them into fine crumbs—a food processor is your best friend here. Mix the crumbs with just enough melted butter to make the mixture resemble wet sand. Don’t drown them; you want it to hold together when pressed. Press the mixture firmly and evenly into the base of a 9-inch springform pan. Use the flat bottom of a measuring cup to get a compact, level surface. Bake the crust for about 10 minutes at 175°C (350°F). This pre-bake step is crucial—it dries out the crust, ensuring it stays crisp even after the creamy filling is added.
The Heart: A Silky, Rich Filling
The secret to a lump-free, velvety cheesecake filling is simple: room temperature ingredients. Set your cream cheese, eggs, and sour cream out on the counter at least two hours before you begin. Cold cream cheese is the number one cause of lumpy batter. Start by beating the softened cream cheese and sugar on a low speed until completely smooth, scraping down the sides of the bowl often. Then, add your melted high-quality dark chocolate (at least 60% cacao), ensuring it’s cooled slightly so it doesn’t scramble the eggs. Add the eggs one at a time, mixing on low speed only until the yolk disappears. Over-mixing incorporates too much air, which causes the cheesecake to puff up in the oven and then crack as it cools. Finally, gently fold in the sour cream and vanilla extract. The final batter should be thick, glossy, and uniform.
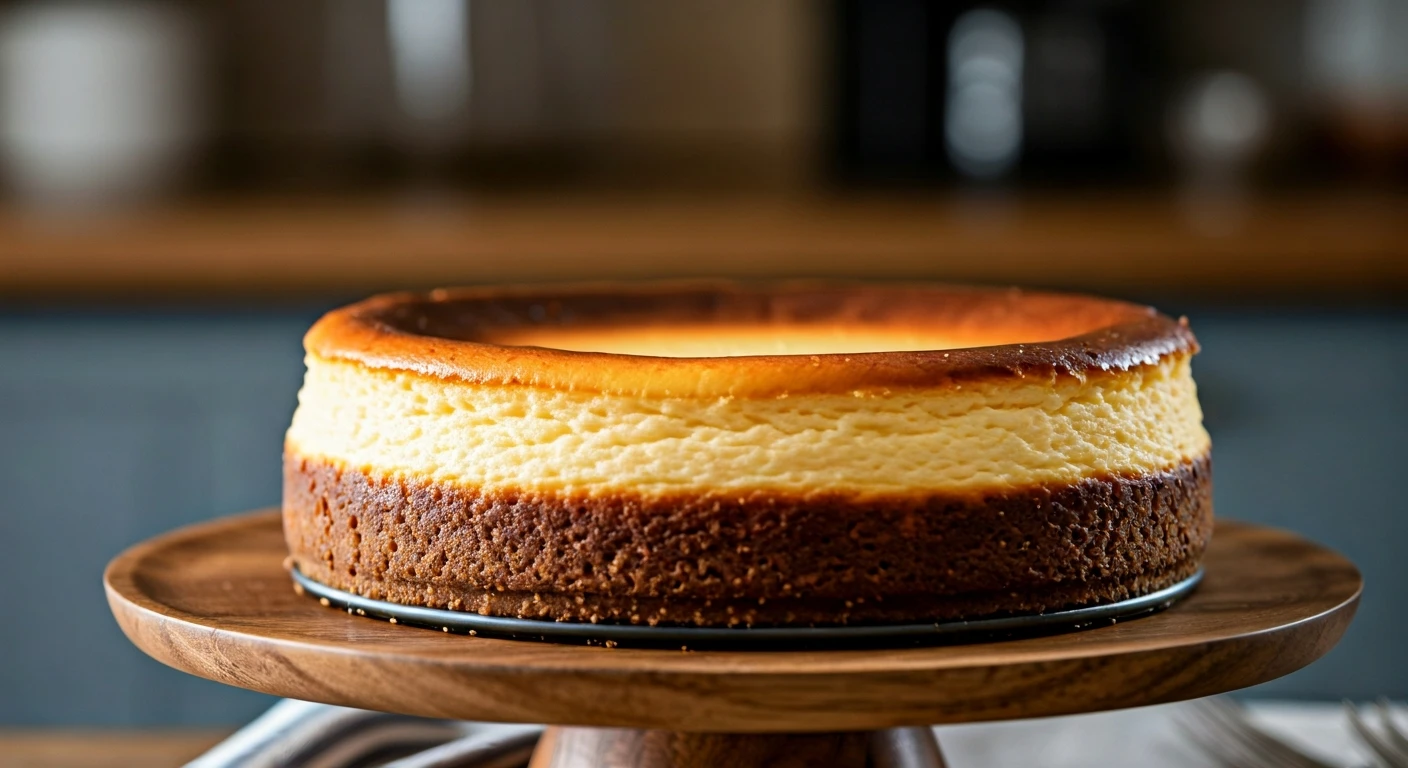
The Technique: Why a Water Bath is Non-Negotiable
If you want a picture-perfect cheesecake, the water bath (or bain-marie) is your most important tool. This technique creates a steamy, humid environment in the oven, which allows the cheesecake to bake gently and evenly. This prevents the edges from baking faster than the centre, which is what causes cracks to form. To prepare a water bath, wrap the outside of your springform pan with two to three layers of heavy-duty aluminium foil, ensuring there are no gaps for water to seep in. Place the wrapped pan inside a larger roasting pan. Pour your prepared filling into the crust, then place the entire setup in the preheated oven. Carefully pour boiling water into the larger roasting pan until it comes about halfway up the sides of your cheesecake pan. This gentle, moist heat is the difference between a good cheesecake and a great one.
The Bake and the Crucial Cool-Down
Bake the cheesecake at 160°C (325°F) for about 60-70 minutes. You’ll know it’s done when the edges are set, but the centre still has a slight wobble (it shouldn't be liquid, just jiggly like set custard). Do not over-bake, as that’s another common cause of dryness and cracking. Once the baking time is up, the cooling process begins. This is where most people go wrong. Abrupt temperature changes are the enemy. Turn the oven off completely, prop the oven door open slightly with a wooden spoon, and let the cheesecake cool inside the oven for one full hour. This slow, gradual cool-down is essential. After an hour, remove the cheesecake from the oven and the water bath, and let it cool completely on a wire rack at room temperature. Only then should you cover it and transfer it to the refrigerator to chill for at least six hours, or preferably overnight.
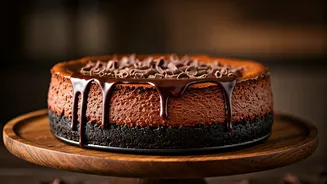
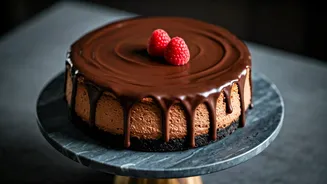
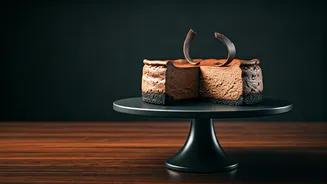
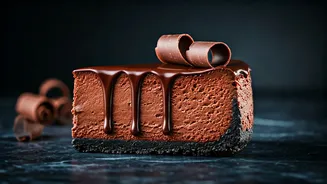
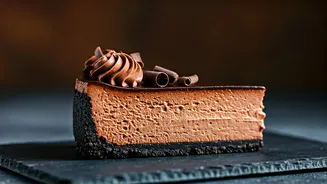
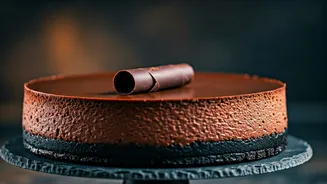
The Grand Finale: A Glossy Ganache Topping
While this method should give you a flawless top, a layer of chocolate ganache is the perfect finishing touch. It adds another layer of decadent flavour and guarantees a sleek, professional look. Making it is simple: heat 1/2 cup of heavy cream in a small saucepan until it just begins to simmer. Pour the hot cream over 1 cup of finely chopped dark chocolate in a heatproof bowl. Let it sit for five minutes without stirring, allowing the heat to melt the chocolate. Then, whisk gently from the centre outwards until a smooth, glossy ganache forms. Let it cool for about 10-15 minutes until it’s slightly thickened but still pourable. Pour it over your chilled cheesecake, using a spatula to gently guide it to the edges. The result is a stunning, deeply chocolatey dessert that’s ready for its close-up.