


Rule 1: Verify, Then Trust
The single most important new rule is that your UPI app must now show the recipient's actual bank-registered name before you confirm a payment. [23] This change, rolled out in June 2026, is a huge blow to scammers who used misleading nicknames. [23] Gone
are the days of seeing “Bhai” or a saved contact name; you will now see the person's official name, providing an extra layer of verification. [23] Make it a habit to always check this name. If it doesn't match the person you intend to pay, stop the transaction immediately. This simple check is your strongest defence against sending money to the wrong account.
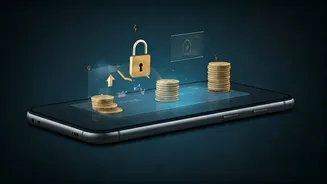
Rule 2: Never Enter Your PIN to Receive Money
This is a golden rule that can't be repeated enough: you never need to enter your UPI PIN to receive money. [15] Scammers have become creative, often using 'request money' features or fake QR codes to trick you. [3, 4] They might send you a payment request disguised as a refund or cashback, hoping you'll approve it in a hurry. [2] Or they might tell you to scan a QR code to receive a payment. [15] Remember, scanning a QR code and entering your PIN is always for *paying* money, not receiving it. [18] If anyone asks for your PIN to send you funds, it is a guaranteed scam. [15]
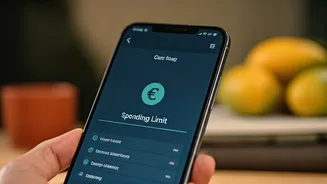
Rule 3: Use UPI Lite for Small, Everyday Spends
Think of UPI Lite as your digital 'chillar' or loose change. It's an “on-device wallet” that you can top up with a small amount from your main bank account. [15] You can then make small payments (usually up to ₹500 or ₹1,000) instantly without entering a PIN each time. [7, 15] This is perfect for paying for your daily coffee, a plate of momos, or an auto ride. The benefits are twofold: it’s faster for small transactions, and it keeps your main bank statement clean from dozens of tiny entries, making it much easier to track your larger expenses. [7, 13]
Rule 4: Separate Your Spends from Your Savings
The seamless nature of UPI can make it easy to lose track of spending. [22] A smart strategy is to have two bank accounts. One should be your primary savings or receiving account where you get your allowance or any part-time income. The second should be a low-balance “spending account” linked to your UPI apps. [22] Periodically move a fixed weekly or monthly budget from your savings to your spending account. This creates a natural brake on your spending. When the spending account runs low, it’s a clear signal to reassess your expenses, rather than dipping directly into your main savings.
Rule 5: Review Your Transaction History Weekly
Your UPI app's transaction history is a powerful budgeting tool. [13] Many students are shocked to find they make 60-90 UPI transactions a month, with a large chunk being impulsive. [13] Set a reminder every Sunday to spend ten minutes reviewing your past week's UPI spends. Most apps categorise your payments, showing you exactly how much went towards food, travel, and shopping. [7] This weekly check-in helps you identify spending patterns, cut down on unnecessary expenses, and stay accountable to your budget without the hassle of manual tracking.
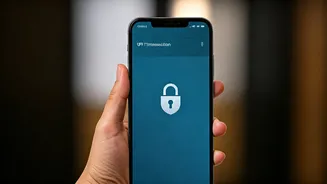
Rule 6: Beware of Phishing and Fake Support Calls
Scammers are increasingly sophisticated. They might send you links via SMS or social media that lead to fake websites designed to steal your UPI details. [2, 3] They may also call you pretending to be from your bank or a payment app, asking for your PIN or an OTP to "resolve an issue" or "verify your account". [2, 5] Remember, no bank or legitimate company will ever call you and ask for your PIN or OTP. [2] Never click on suspicious links, and never install screen-sharing apps like AnyDesk at the request of a stranger. [5, 15]
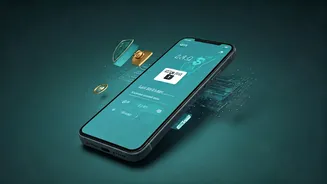
Rule 7: Build Your Credit Score While You Spend
In 2026, UPI is not just for payments; it's a tool for building your financial future. [7] New features like 'Credit Line on UPI' allow banks to offer small, pre-approved credit amounts (e.g., ₹5,000) directly on your UPI ID. [7] When you use this credit for your spends and repay it on time, it gets reported to credit bureaus. [7] This helps you build a credit history even before you get your first job. By the time you graduate, you could have a healthy credit score, making it easier to get loans for further education or other needs at better interest rates. [7]