



Step 1: Select the Right Space
The first step is to designate a specific area for drying clothes. This doesn't have to be a whole room, but it should be a spot with good ventilation. A spare room, a covered balcony protected from rain, or even a corner of your living room can work.
Avoid drying clothes in your primary bedroom or spaces where you spend a lot of time, as this can increase humidity and lead to an unpleasant, damp feeling in the air. The ideal spot is one where you can set up a drying rack without it being a major obstruction. Choosing a room with an exhaust fan, like a bathroom, can also be effective for smaller loads as it helps pull moisture out of the air.
Step 2: Maximise Air Circulation
Airflow is more important than heat for drying clothes indoors. Once you have your spot, focus on moving the air around. Place your drying rack under a ceiling fan or position a pedestal fan to blow air across the clothes. This continuous movement of air helps whisk away the moisture evaporating from the fabric, significantly speeding up the drying process. If you're using a pedestal fan, don't point it directly at the clothes; instead, aim it to create a breeze that flows across the garments for more even drying. Even cracking a window slightly, if it's not raining in, can create cross-ventilation that makes a big difference.
Step 3: Invest in the Right Equipment
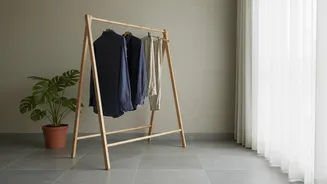
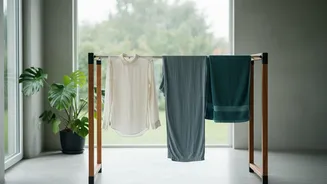
A good-quality, foldable clothes drying rack is a monsoon essential. These come in various sizes, from floor-standing models to wall-mounted and ceiling-mounted options, making them suitable for any home size. Using hangers for shirts, kurtas, and dresses is also a great hack. Hanging clothes exposes more of the surface area to the air, allowing them to dry faster and more evenly. It also helps in reducing wrinkles. Avoid overcrowding the rack; leave enough space between garments so that air can circulate freely around each piece. If clothes are touching, they trap moisture, which slows down drying and can cause musty odours.
Step 4: Prepare Your Laundry Correctly
The drying process begins in the washing machine. Use the highest spin cycle your fabrics can tolerate. Running an extra spin cycle can remove a surprising amount of excess water, which drastically cuts down on indoor drying time. Don't let wet clothes sit in the washing machine, as musty smells can develop in under an hour in a damp, enclosed drum. For particularly stubborn musty odours, adding half a cup of white vinegar or baking soda to the rinse cycle can help neutralise smells and soften clothes.
Step 5: Fight Humidity and Odours
High humidity is the main enemy during the monsoon. If you live in a very humid area, investing in a dehumidifier can be a game-changer. A dehumidifier pulls moisture directly from the air, creating a much better environment for drying clothes and preventing the growth of mould. An air conditioner set to 'dry' mode can also help reduce room humidity. To keep your wardrobe and stored clothes from absorbing moisture and smelling stale, place moisture absorbers like silica gel packets, camphor, or even a small open bowl of baking soda inside cupboards.
Step 6: Use Heat Sparingly and Safely
While airflow is key, a little bit of heat can help with very damp items. For clothes that are still slightly damp after air-drying, a quick press with a hot iron can remove the last bits of moisture, especially in thicker areas like collars and seams. This is particularly useful for jeans and heavy cottons. Some people use heated clothes rails, which use low heat to gently dry fabrics. If using any heat source, ensure you keep garments at a safe distance to prevent damage, especially to delicate or synthetic fabrics.