

Meet the SCOBY: The Heart of Your Brew
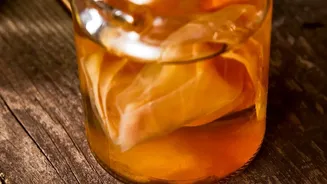
Before you start, it’s essential to understand the star of the show: the SCOBY. This acronym stands for Symbiotic Culture of Bacteria and Yeast. It looks like a pale, rubbery, pancake-shaped disc and is often called the 'mother' because it helps create
new batches of kombucha. This living culture is not a mushroom, but a biofilm housing a cooperative community of microorganisms. The yeast in the SCOBY breaks down the sugar in your tea into ethanol and carbon dioxide, while the bacteria convert these into various organic acids, giving kombucha its characteristic tangy flavor. You'll need both the solid SCOBY disc and some starter tea (strong, unflavored kombucha from a previous batch) to get started. The starter tea helps acidify the new brew quickly, protecting it from unwanted microbes.
Gather Your Gear and Ingredients
Making kombucha doesn’t require much specialized equipment, but cleanliness is key. You will need a large glass jar (a gallon-size pickle jar works well), a cloth cover (like a coffee filter or clean tea towel), and a rubber band. For ingredients, you’ll need filtered water, plain white cane sugar, black or green tea (avoiding teas with oils like Earl Grey), and your SCOBY with at least one cup of starter tea per gallon. For the second, fizzy fermentation, you will also need some pressure-safe glass bottles, such as swing-top bottles.
Step 1: The First Fermentation (F1)
This is where the magic begins. First, brew a strong, sweet tea. Bring about four cups of filtered water to a boil, remove from heat, dissolve one cup of sugar completely, and then steep your tea bags or loose-leaf tea for about 10-15 minutes. Once steeped, remove the tea and add the remaining cool, filtered water to your large glass jar. The most critical step is to let the sweet tea cool to room temperature (below 90°F or 32°C). Adding a SCOBY to hot tea can kill the delicate cultures. Once cool, gently add your SCOBY and the starter tea. Cover the jar with a breathable cloth and secure it with a rubber band. Place the jar in a warm, dark place for 7 to 14 days. During this time, the SCOBY will consume the sugar, and the tea will transform from sweet to pleasantly tart. You may see a new, thin layer of SCOBY forming on the surface.
Step 2: The Second Fermentation (F2) for Fizz
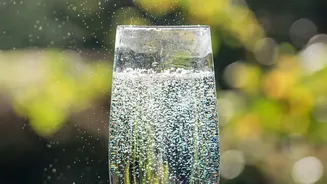
After your first fermentation is complete and the kombucha tastes to your liking, it’s time to create that signature fizz. This second stage happens in sealed bottles. Carefully remove the SCOBY and a couple of cups of liquid to use as starter tea for your next batch. Pour the remaining kombucha into your pressure-safe bottles, leaving some headspace at the top. This is also your chance to add flavor. You can add a tablespoon or two of fruit juice, fresh fruit purée, or herbs like ginger to each bottle. The sugars in the fruit will feed the residual yeast in the kombucha, creating carbon dioxide. Since the bottles are sealed, this gas gets trapped in the liquid, creating carbonation. Seal the bottles tightly and leave them at room temperature for another 2 to 5 days, 'burping' them daily by briefly opening the cap to release excess pressure and prevent explosions. Once fizzy, refrigerate the bottles to stop the fermentation process.
A Note on Probiotics and Safety
One of kombucha's main draws is its probiotic content. The fermentation process cultivates beneficial bacteria and yeasts that can contribute to a healthy gut microbiome. While many people enjoy these benefits, scientific research is still ongoing to fully validate all health claims. When brewing at home, safety and hygiene are paramount to prevent the growth of harmful mold or bacteria. Always use clean jars and utensils. A healthy brew should smell mildly vinegary or sour; if you see fuzzy, colourful mold or it smells unpleasant, discard the batch and start over with a fresh SCOBY.