


Why Is Everyone Suddenly Doing This?
The humble wall squat, or wall sit, isn't new. It’s a staple in physiotherapy and athletic training. So why the sudden fame? The trend seems to be supercharged by recent scientific findings. A major study published in the British Journal of Sports Medicine
highlighted isometric exercises—where you hold a static position—as being exceptionally effective for lowering blood pressure. The wall squat is a prime example. The 120-second (two-minute) duration has emerged as a popular benchmark from these discussions, offering a clear, challenging, yet achievable goal that’s perfect for a social media challenge. It’s the ideal blend of a time-tested exercise and fresh, compelling scientific backing.
The Real Benefits Beyond the Hype
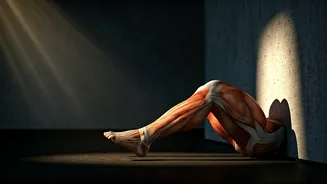
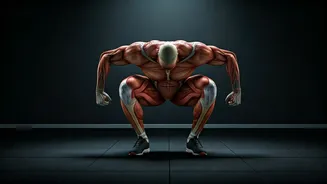
While lower blood pressure is a fantastic perk, the benefits of the wall squat don’t stop there. This exercise is a powerhouse for building muscular endurance, primarily in your lower body. It targets the quadriceps (front of your thighs), hamstrings (back of your thighs), and glutes. By holding the position, you force these muscles to stay contracted, which improves their stamina and strength over time. Because it's a low-impact exercise, it’s also kinder on your joints than activities like running or jumping, making it a great option for many people. Plus, it actively engages your core as you brace your abdominals to keep your back flat against the wall, contributing to better stability and posture.
How to Do the Perfect Wall Squat
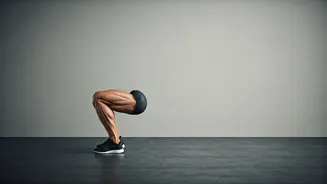
Form is everything with the wall squat. Doing it incorrectly can strain your knees and back. Follow these steps for the perfect hold: 1. **Find Your Wall:** Stand with your back against a smooth, sturdy wall. 2. **Position Your Feet:** Your feet should be shoulder-width apart and about two feet away from the wall. They should be flat on the floor. 3. **Slide Down:** Slowly slide your back down the wall until your thighs are parallel to the floor, as if you're sitting in an invisible chair. Your knees should be directly above your ankles, forming a 90-degree angle. 4. **Check Your Form:** Ensure your back, from your shoulders to your lower back, is pressed firmly against the wall. Engage your core muscles to prevent your lower back from arching. 5. **Hold It:** Keep your arms relaxed by your sides or crossed over your chest. Now, hold this position. Breathe steadily and try to relax into the pose, even as your muscles start to burn.
Common Mistakes to Avoid
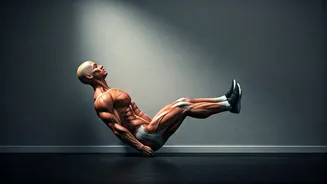
To get the benefits and prevent injury, watch out for these common errors: * **Sliding Too Low:** Going past the 90-degree angle puts excessive pressure on your knees. Keep your thighs parallel to the ground. * **Leaning Forward:** Your torso should be upright, with your back completely supported by the wall. Don't let your shoulders hunch or come off the wall. * **Knees Over Toes:** If your knees are drifting past your toes, your feet are too close to the wall. Shimmy your feet forward until your knees are aligned directly above your ankles. * **Holding Your Breath:** It’s a natural reaction when you’re straining, but you need to keep breathing. Consistent, deep breaths will deliver oxygen to your working muscles and help you hold the position longer.
How to Make It Part of Your Routine
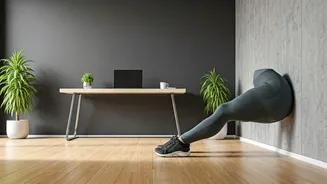
Jumping straight into a 120-second hold can be tough. Start where you are. Begin with 30-second holds and focus on maintaining perfect form. Once you can comfortably hold for 30 seconds, add 10-15 seconds to your time each week. The goal is progressive overload, not instant perfection. The beauty of this exercise is its versatility. You can do it while waiting for your food to cook, during a commercial break on TV, or even against your office wall for a quick midday reset. Try doing 2-3 sets with a minute of rest in between for a fantastic lower-body workout in under 10 minutes.