

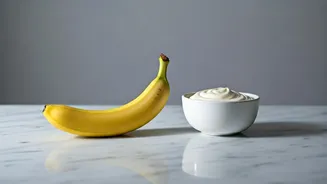


The Magic of Banana 'Nice' Cream
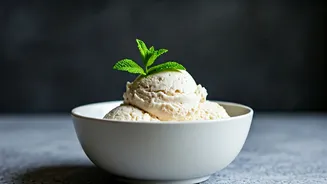
The simplest way to enter the world of homemade healthy ice cream is with 'nice' cream. The name comes from it being a "nicer" alternative to traditional ice cream. The magic lies in one key ingredient: frozen bananas. When blended, frozen bananas transform
into a texture that is shockingly similar to creamy soft-serve. All you need is a food processor or a high-speed blender. Start with a few ripe bananas, the kind with brown spots, as they offer the most natural sweetness. Peel and slice them, then freeze the pieces on a tray for at least two to three hours. Once solid, transfer the frozen banana slices to your blender or food processor. Pulse and then blend until a smooth, creamy consistency forms. This might take a minute or two, and you may need to scrape down the sides a few times. For an even creamier result, you can add a splash of plant-based milk, like almond or coconut milk. Enjoy it immediately for a soft-serve texture, or freeze it for a couple of hours for a firmer, scoopable ice cream.
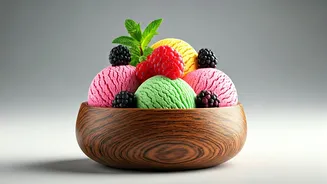
Flavorful Twists on Banana Nice Cream
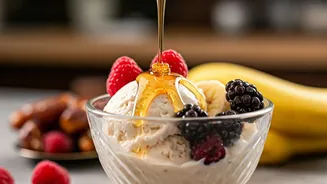
Once you've mastered the basic banana nice cream, the flavor possibilities are endless. For a rich chocolate version, add a tablespoon or two of unsweetened cocoa powder to the blender with the bananas. If you're a fan of peanut butter, a spoonful of natural peanut butter creates a decadent and satisfying treat. For a fruity twist, add other frozen fruits like strawberries, blueberries, or mango along with the bananas. Mint chocolate chip can be created by adding a touch of peppermint extract and some dark chocolate chips after blending. The key is to start with the banana base and experiment with your favorite healthy add-ins to create your perfect custom flavor.
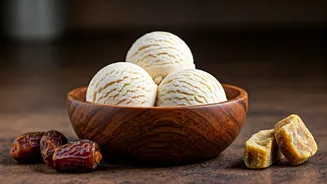
Date-Sweetened Coconut Cream Delight
For a richer, more traditional ice cream texture without refined sugar, dates are a fantastic natural sweetener. They lend a subtle, caramel-like flavor and are packed with fiber. This recipe uses full-fat coconut milk as a creamy, dairy-free base. To start, you'll need about 10-20 pitted dates, depending on the variety and your desired sweetness. Soak the dates in warm water for about five to ten minutes to soften them, which helps them blend more smoothly. In a high-powered blender, combine two cans of full-fat coconut milk, the soaked dates (drained), a tablespoon of vanilla extract, and a pinch of salt. You can also add a tablespoon of nut butter for extra creaminess. Blend everything until the mixture is completely smooth. From here, you can either use an ice cream maker according to the manufacturer's instructions for the best texture, or pour the mixture into a loaf pan for a no-churn version. If going no-churn, freeze for at least four to six hours, letting it thaw for 10-15 minutes before scooping.
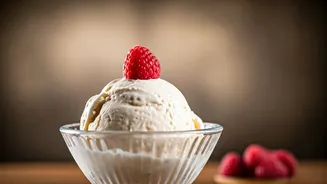
Classic Flavors with Maple Syrup or Honey
If you have an ice cream maker and crave classic vanilla or other traditional flavors, you can easily swap refined sugar for maple syrup or honey. These natural sweeteners work well in custard-style bases or simpler Philadelphia-style recipes. A good starting ratio is to substitute every cup of sugar with about 2/3 to 3/4 cup of honey or maple syrup, as they are sweeter and add liquid. For a simple vanilla ice cream, whisk together whole milk, heavy cream, your choice of maple syrup or honey, vanilla extract, and a pinch of salt. For an even creamier result, some recipes include egg yolks to create a custard base. Chill the mixture thoroughly before churning it in your ice cream maker. The result is a smooth, scoopable ice cream that tastes like a premium product but is sweetened entirely by nature.
Tips for Perfect Refined Sugar-Free Ice Cream
Creating homemade ice cream without refined sugar is an art, and a few tips can help you achieve the best texture and flavor. First, fat is your friend. Using full-fat ingredients like coconut cream or whole milk is crucial for a creamy, less icy result. Natural sweeteners like honey and maple syrup have a higher water content than sugar, which can sometimes lead to a harder freeze. Some recipes suggest adding a tablespoon of a neutral-flavored alcohol like vodka to the base; it won't add a noticeable flavor but lowers the freezing point, keeping the ice cream softer and more scoopable. For no-churn recipes, freezing the mixture in a metal loaf pan can help it freeze more evenly and quickly. Finally, always let your homemade ice cream sit on the counter for 5-15 minutes before scooping. This allows it to soften just enough for the perfect serve.