


The Rise of a Statement Plant
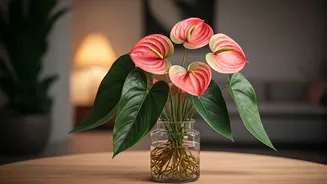
In the world of houseplants, some plants are simply plants, and others become icons. The pink anthurium, with its waxy, vividly colored spathe (the “flower” part) and elegant heart shape, has officially achieved icon status. It’s a living sculpture that
fits perfectly into modern design trends, from the minimalist desire for a single pop of color to the maximalist joy of “dopamine decor.” Its association with trends like Barbiecore has only cemented its place as the must-have plant of the moment. Unlike the famously finicky Fiddle Leaf Fig of years past, the anthurium offers a more forgiving kind of beauty. It communicates its needs clearly and rewards basic care with long-lasting, vibrant blooms. This blend of high-impact aesthetics and manageable care is the sweet spot for a new generation of plant parents who want their homes to feel curated, alive, and personal without requiring a horticulture degree.
Propagation: The Ultimate DIY Flex
So, you have a beautiful pink anthurium. What’s better than one? Two, or three, or enough to give as envy-inducing gifts. This is where propagation comes in. The term simply means creating new plants from an existing one. For anthuriums, the most straightforward method is division. This involves separating a mature, healthy plant into smaller, independent ones. Why propagate? First, it’s free. Instead of buying a new plant, you’re using what you have to multiply your collection. Second, it’s incredibly satisfying. There’s a unique sense of accomplishment in successfully nurturing a new plant into existence. It connects you to the lifecycle of your plant and deepens your appreciation for how it grows. Plus, it ensures your new plants are already acclimated to your home's environment, giving them a head start on a healthy life.
Gather Your Simple Tools
You don't need a professional greenhouse setup to propagate an anthurium. The process is surprisingly low-tech. Before you begin, gather these essentials to make the process clean, safe, and effective: * **A healthy, mature anthurium:** Look for a plant that is lush and has multiple stems or “clumps” growing from the base. A small, single-stem plant is not ready for division. * **Clean, sharp scissors or a knife:** Sterilize your cutting tool with rubbing alcohol to prevent introducing bacteria to the plant. * **Small pots with drainage holes:** Each new division will need its own home. Choose pots that are only slightly larger than the root ball of the division. * **Fresh potting mix:** Anthuriums love a chunky, well-draining mix. An orchid mix, or a standard potting soil amended with orchid bark and perlite, works perfectly.
A Step-by-Step Guide to Division
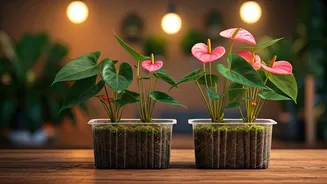
Choose a day when you have a little time and can make a small mess. The best time to divide is during the spring or summer growing season. 1. **Gently Remove the Plant:** Carefully slide the mother plant out of its pot. If it’s stuck, you can gently squeeze the sides of the pot or tap the bottom to loosen it. 2. **Examine the Roots and Stems:** Once it’s out, gently shake off the excess soil. You will see that the plant is made of several smaller sections, each with its own set of roots and leaves. These are your future plants. 3. **Tease Apart the Sections:** Identify a section that has at least two or three leaves and a healthy-looking root system attached. Using your fingers, gently tease this section and its roots away from the main plant. If the roots are tightly tangled, use your sterilized knife or scissors to make a clean cut, ensuring each division retains a substantial portion of the root system. 4. **Repot the Divisions:** Fill your new, smaller pots with a bit of fresh potting mix. Place one division in each pot, holding it at the level it was previously growing. Fill in around the roots with more soil, gently firming it down to remove air pockets. Don’t pack it too tightly. 5. **Don't Forget Mom:** Repot the original mother plant back into its pot, or a slightly smaller one if you removed a large portion. Top it off with some fresh soil.
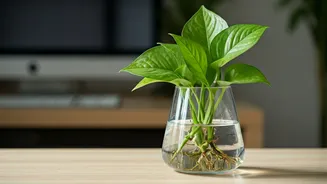
Caring for Your New Plant Babies
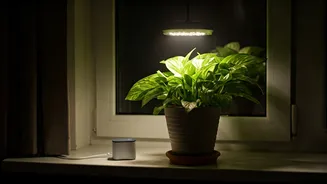
Your new anthurium divisions have just been through a stressful experience, so they need a little TLC. Water each new plant thoroughly, allowing excess water to drain completely. Then, place them in a location that receives bright, indirect light—the same kind of light the mother plant enjoys. Avoid direct sunlight, which can scorch the leaves. For the next few weeks, keep the soil consistently moist but not waterlogged. The plants are focusing their energy on establishing new roots, so you may not see new leaf growth right away. Be patient. Once you see signs of new growth, you can resume a normal watering schedule (allowing the top inch or two of soil to dry out between waterings) and begin fertilizing at half-strength every month or so during the growing season. Before you know it, you’ll have a whole family of thriving pink anthuriums.