




Looking for a unique way to refresh your walls? Origami wall art offers a stunning, affordable, and deeply personal touch to any room. It transforms simple sheets of paper into captivating 3D installations that reflect your style and creativity.
What Exactly Is Origami Wall Art?
Forget
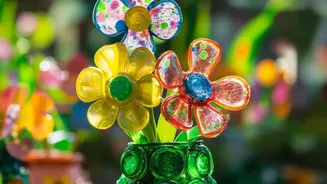
a single paper crane on a shelf. Origami wall art is about creating a larger, cohesive art piece from multiple folded paper elements. Think of a flock of 3D paper butterflies fluttering across a bedroom wall, a series of geometric modules forming a striking pattern above a sofa, or delicate paper flowers arranged in a shadow box frame. It's a scalable and versatile form of DIY decor that ranges from minimalist arrangements to large, intricate installations. The beauty lies in its simplicity and the impressive visual impact you can achieve with just paper and a bit of patience.
Why Choose Paper for Your Walls?
Decorating with paper is both practical and beautiful. One of the biggest advantages is affordability; you can create a large, impactful piece for a fraction of the cost of a traditional painting or print. Paper is also incredibly lightweight, making it easy to hang without needing heavy-duty tools or creating large holes in your walls. Furthermore, the creative process itself is a benefit. The focused, repetitive nature of folding paper is known to be a meditative activity that can help reduce stress and anxiety while boosting creativity. It’s a mindful way to create something truly unique for your space.
Gathering Your Simple Toolkit
Getting started with origami wall art doesn't require a trip to a specialised art store. You likely have most of what you need at home. Your primary material is, of course, paper. While traditional origami paper ('kami') is a great, thin option, you can also use coloured craft paper, cardstock for sturdier shapes, or even patterned wrapping paper for a unique look. Besides paper, you'll want a ruler, a pair of scissors or a craft knife for precise cutting, and some form of adhesive like a glue stick or double-sided tape. For hanging, consider damage-free options like removable mounting putty or lightweight thread.
Easy Shapes Perfect for Beginners
The key to a beautiful origami wall display is starting with simple, effective shapes that you can produce consistently. Classic choices like the butterfly, heart, and simple flowers are popular for a reason—they are relatively easy to master and look fantastic in groups. Another brilliant option is modular origami, where you fold multiple identical 'units' that lock together to form larger geometric patterns. The Sonobe unit is a famous example, allowing you to build everything from small pyramids to complex, tessellating wall panels. Even a simple square folded into a basic diamond or pyramid shape, when repeated in different colours, can create a stunning geometric display.
Designing Your Masterpiece
Before you start sticking things to the wall, take a moment to plan your composition. Lay your folded pieces on the floor to experiment with arrangements. Consider creating a colour gradient for a modern, ombre effect, or group colours together to create distinct zones. You could arrange shapes in a structured grid, a swirling, organic line, or a circular burst from a central point. Think about the scale of your piece in relation to your furniture and the size of the wall. A small arrangement can get lost on a large wall, while a dense, oversized installation can create a powerful focal point. Playing with different sizes of the same shape can also add depth and visual interest.
Mounting and Displaying Your Art
Once you're happy with your design, it's time to bring it to life on your wall. For lightweight paper shapes, removable mounting tape or adhesive putty are excellent choices that won't damage your paint. Apply a small amount to the back of each piece and press it firmly onto the wall. For a more mobile or temporary display, you can string your origami pieces onto threads and hang them from a dowel or stick. This creates a beautiful hanging mobile effect. For a more polished, permanent look, consider arranging your shapes on a piece of cardstock or foam board and then framing it in a shadow box. This protects the paper from dust and damage while turning it into a professional-looking piece of art.