


The Foundation: A Simple Dough
Let’s start by busting the first myth: the momo wrapper. You don't need any mysterious ingredients. The dough is a simple mix of all-purpose flour (maida), a pinch of salt, and water. Some recipes add a touch of oil for pliability, but it's not strictly
necessary. The real secret isn't in the ingredients, but in the technique. Combine the flour and salt, then gradually add lukewarm water, mixing until a shaggy dough forms. Now comes the important part: knead it. Turn it out onto a lightly floured surface and knead for a solid 8-10 minutes. You’re looking for a dough that’s smooth, soft, and elastic, not sticky. Once you’ve achieved this texture, cover it with a damp cloth and let it rest for at least 30 minutes. This resting period is crucial; it allows the gluten to relax, making the dough much easier to roll out later.
The Heart: A Flavourful Filling
While the dough rests, you can turn your attention to the filling. This is where you can get creative, but a classic vegetarian filling is a great place to start. Finely chop a mix of cabbage, carrots, onions, and maybe some French beans. The key is to get the vegetables as small as possible for a uniform texture. Sauté them with minced ginger, garlic, and a bit of soy sauce and black pepper. The most critical step here is to manage moisture. After cooking, let the vegetable mixture cool and squeeze out any excess water. A soggy filling will lead to torn momos. If you’re using chicken, go for minced chicken (keema) and cook it with the same aromatics. For paneer, simply crumble it and mix it with the sautéed vegetables off the heat. The goal is a flavourful, relatively dry mixture that will steam beautifully inside the wrapper.
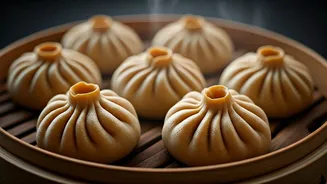
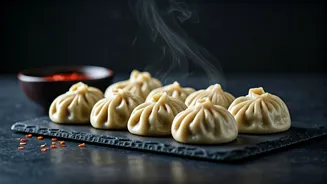
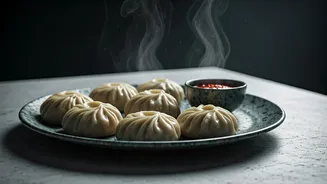
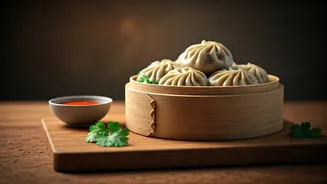
The Art of the Fold (Demystified)
This is the step that intimidates most home cooks, but it doesn't have to be perfect. Your first few momos might look a bit rustic, but they will taste just as delicious. After your dough has rested, divide it into small, equal-sized balls. Roll each ball into a thin circle, about 3-4 inches in diameter. Try to keep the edges thinner than the centre, which will help prevent the base from breaking. Now, place a spoonful of filling in the centre. For the easiest fold, simply bring the edges together to form a half-moon shape and press firmly to seal. You can then create small pleats along the curved edge for that classic look. Another simple method is the pouch: bring all the edges up to the centre and pinch them together, twisting slightly to seal. Don't overthink it. As long as it's sealed, it will work.
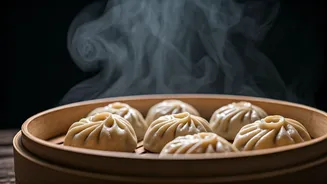
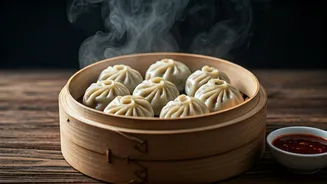
Steaming to Perfection
You don't need a fancy bamboo steamer, though they work wonderfully. A standard metal steamer, a pressure cooker with a steamer insert, or even a DIY setup will do the job. To create your own, place a metal colander or sieve over a pot with a few inches of simmering water, making sure the water doesn't touch the bottom of the colander. Lightly oil the surface of your steamer to prevent the momos from sticking. Arrange the momos in the steamer, leaving a little space between each one as they will expand slightly. Cover and steam for about 10-12 minutes for vegetable momos and 12-15 minutes for chicken. You'll know they're done when the wrappers look translucent and feel non-sticky to the touch.
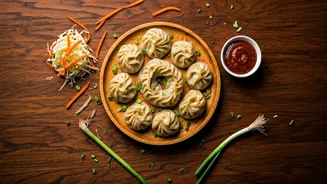
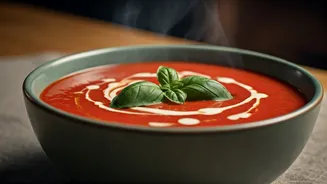
The Essential Fiery Dip
A momo is incomplete without its partner in crime: the chutney. While your momos are steaming, you can whip up a quick version. The quintessential momo chutney is a fiery blend of tomatoes and red chillies. For a simple version, boil a couple of tomatoes and a handful of dried red chillies until soft. Let them cool, then blend them with a few cloves of garlic, a pinch of salt, and a dash of vinegar or lemon juice. You can adjust the number of chillies to control the heat level. This simple, vibrant sauce provides the perfect spicy, tangy counterpoint to the savoury, delicate momo.